
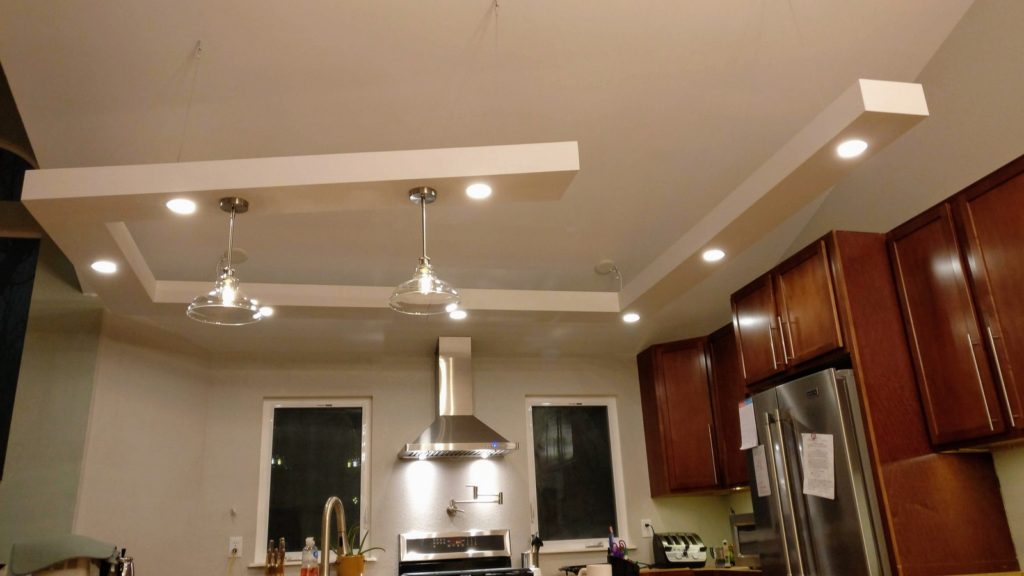
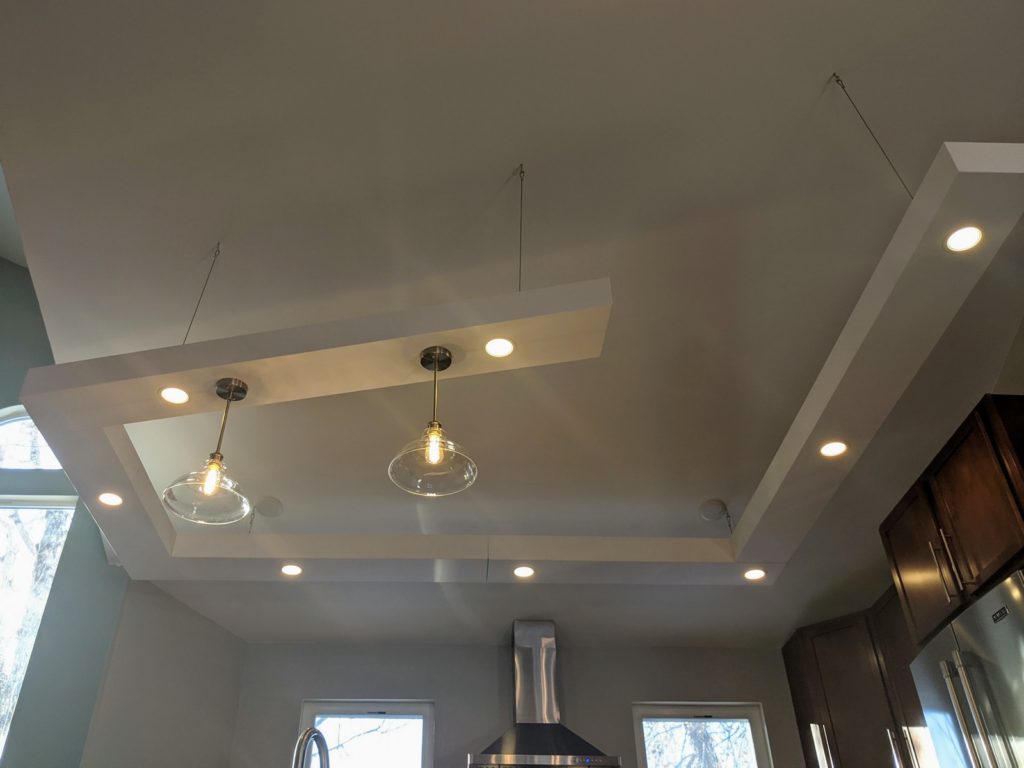
Our recent kitchen remodel included a complete redesign of the lighting. I really love our vaulted ceilings, but they created a lighting challenge in the kitchen. I got creative with my lighting design and came up with this floating recessed lighting concept. I think it turned out pretty cool. What do you think?
Materials
- 1/2″ Plywood
- Plywood Edge Banding
- Steel Cable (1/8″ should be more than sufficient)
- Steel Cable Cutting Tool (if you don’t have another way to cut the cable)
- Steel Cable U-bolts
- Steel Cable Crimping Bands
- Steel Cable Crimping Tool (to crimp the cable bands)
- Screw Eye Hooks for Ceiling
- Screw Eye Hooks for Light Boxes (or I also used 1/2″ pipe hangers)
- LED Recessed Lights (similar to what I bought… mine are out of stock)
- Pendant Lights
- Old work electrical boxes (for pendant lights)
- Ceiling Paint
- Smart Lighting Dimmers (this is what I use with my Smartthings Hub)
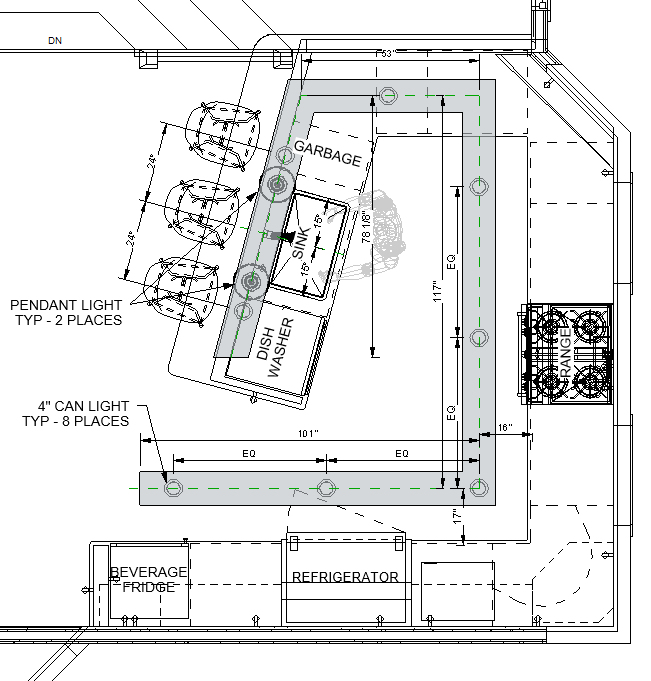
Lighting Locations
Kitchens need a lot of light. Good lighting for work surfaces, cabinets, and eating areas are all essential to creating an inviting and comfortable kitchen.
This custom lighting design serves to provide lighting in all of those key areas. In combination with the windows, under cabinet lighting, and stove hood lights our kitchen is comfortably lit in all the key areas.
The shape of the lighting that I designed generally follows the shape of our kitchen to provide good even light throughout the space. To prevent shadows, I kept the lighting about 18″ in front of any wall cabinets. For other work areas and the eating peninsula, I centered the lighting above the countertops.
Using the pendant lights above the peninsula adds some style… and it’s functional. By putting the pendant lights on a separate circuit, it’s possible to vary the lighting in the space quite a bit depending on the need.
I’d also recommend using dimmers on most of the kitchen lighting. While you are cooking it is nice to have bright light. When you are eating or entertaining it is nice to create some ambiance with a bit dimmer light.
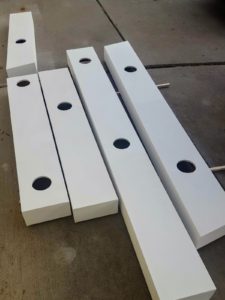
Light Box Construction
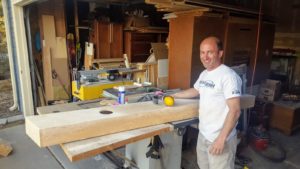
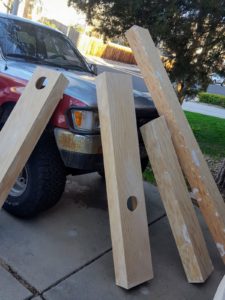
The boxes that hold all of the light fixtures are basic painted plywood construction. I used good quality 1/2″ plywood for a lightweight construction with smooth surfaces. I also chose to miter all of the corners to create a seemless look on the outside.
The boxes were built without the top to allow for assembly, hanging, and wiring of the lights. A small cleat was installed 1/2″ down from the top, so that the top pieces could be installed and brad nailed on the top where the fasteners won’t be seen.
I marked the location for the recessed light fixtures and electrical boxes for the pendant lights and cut them all out with a jigsaw.
The boxes were finished by adding edge banding along the top edge of the boxes, filling, sanding and painting with basic flat white ceiling paint.
I prefinished all of the pieces before hanging them up, but it was still necessary to add a final coat of paint afterwards to cover up all of the handling marks and such from hanging them up and installing the wiring.
Hanging The Boxes
The trickiest part of this project was hanging the boxes. First, I layed out the centerline of the boxes with tape on the floor. Then I located the ceiling joists in the area with my stud finder. I used a plumb bob to drop down from the joists and mark a spot on the tape for each hanging wire location. Those locations were then transferred to the light boxes to install the hangers inside the boxes. The ceiling locations were drilled and eye bolts were screwed into the joists.
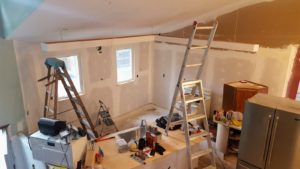
Leslie helped me hoist all of the light boxes in place and install the steel cables. It was a multiple phased approach. First, I just got them close and clamped all of the boxes together. This is where the U-bolts come in handy. I used them on the steel cables initially to allow for easy adjustment.
After a second… And third pass around to get everything leveled and looking good, I replaced the U-bolts with the crimping bands and trimmed the cables for the finished clean look. You will need a special crimping tool for this.
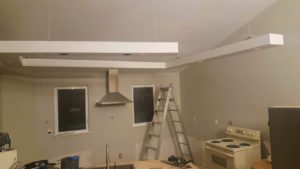
This cable is not easy to cut, so you might want to invest in a cable cutter like this one if you don’t have one.
Wiring And Finishing Up
I located electrical junction boxes in the ceiling near two of the hanging cables. This provided an easy way to route the wiring along the cable for each of the two lighting circuits. One for the pendant lights and one for the recessed lights.
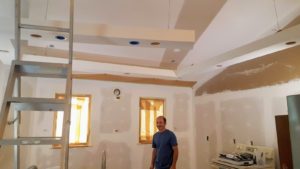
Holes were drilled between the boxes to install the wiring to all of the lighting locations. I really like this type of LED recessed lighting. It is super easy to install without the old school canisters that older recessed lights required.
Careful measuring was required to locate and cut slots in the tops for the boxes to provide clearance for the steel cables. After the wiring was completed, I installed the tops on the boxes and pin nailed them in place.
One final coat of paint was rolled on to finish this project off. Finished… Nice!
Oops…
Everyone makes mistakes and I made a big one on this build! ? I built the angled piece backwards. I was building the piece upside down on my workbench and I forgot to flip the angles upside down also. When I went to install the pieces it didn’t fit! Ahhhh!
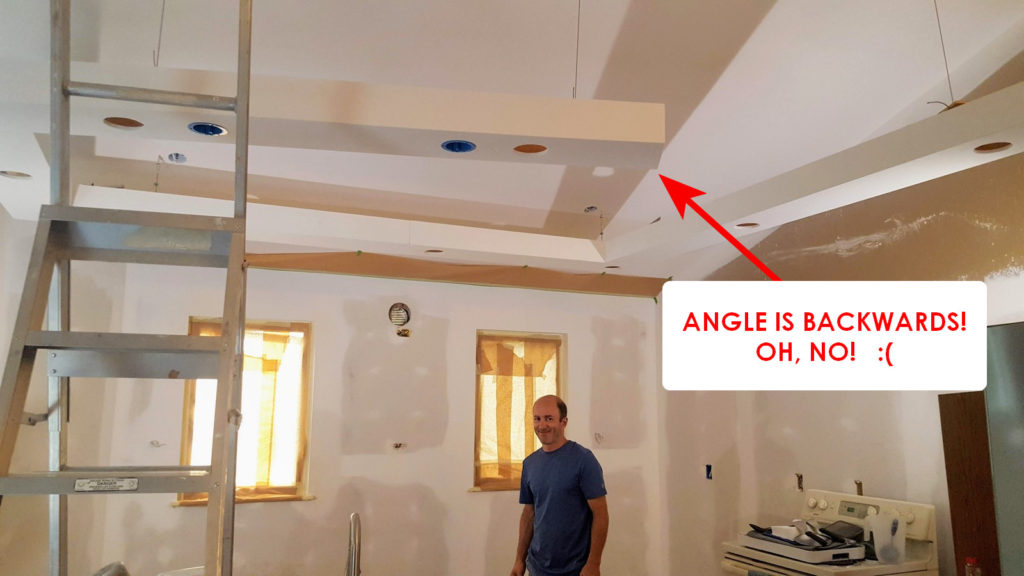
It was a bit painful to fix, but what I decided to do was flip the box over and use drywall joint tape and compound to cover the now exposed joints on the edges. Of course, I also had to patch up the holes and cut new holes for the lights. Oh well… Mistakes happen and you can’t notice the mistake now. ?
Till next time…
Love how you combined creativity and functionality—your custom kitchen lighting build is truly inspiring!
Thank you very much for the kind words. I think that’s exactly what I’m trying to accomplish with a lot of my projects.
cool post, strong work per usual! Thanks for sharing your mistakes, it is nice to be reminded I’m not the only one. ha
Thanks, bud. Mistakes are just another way to learn more, right? 😉