
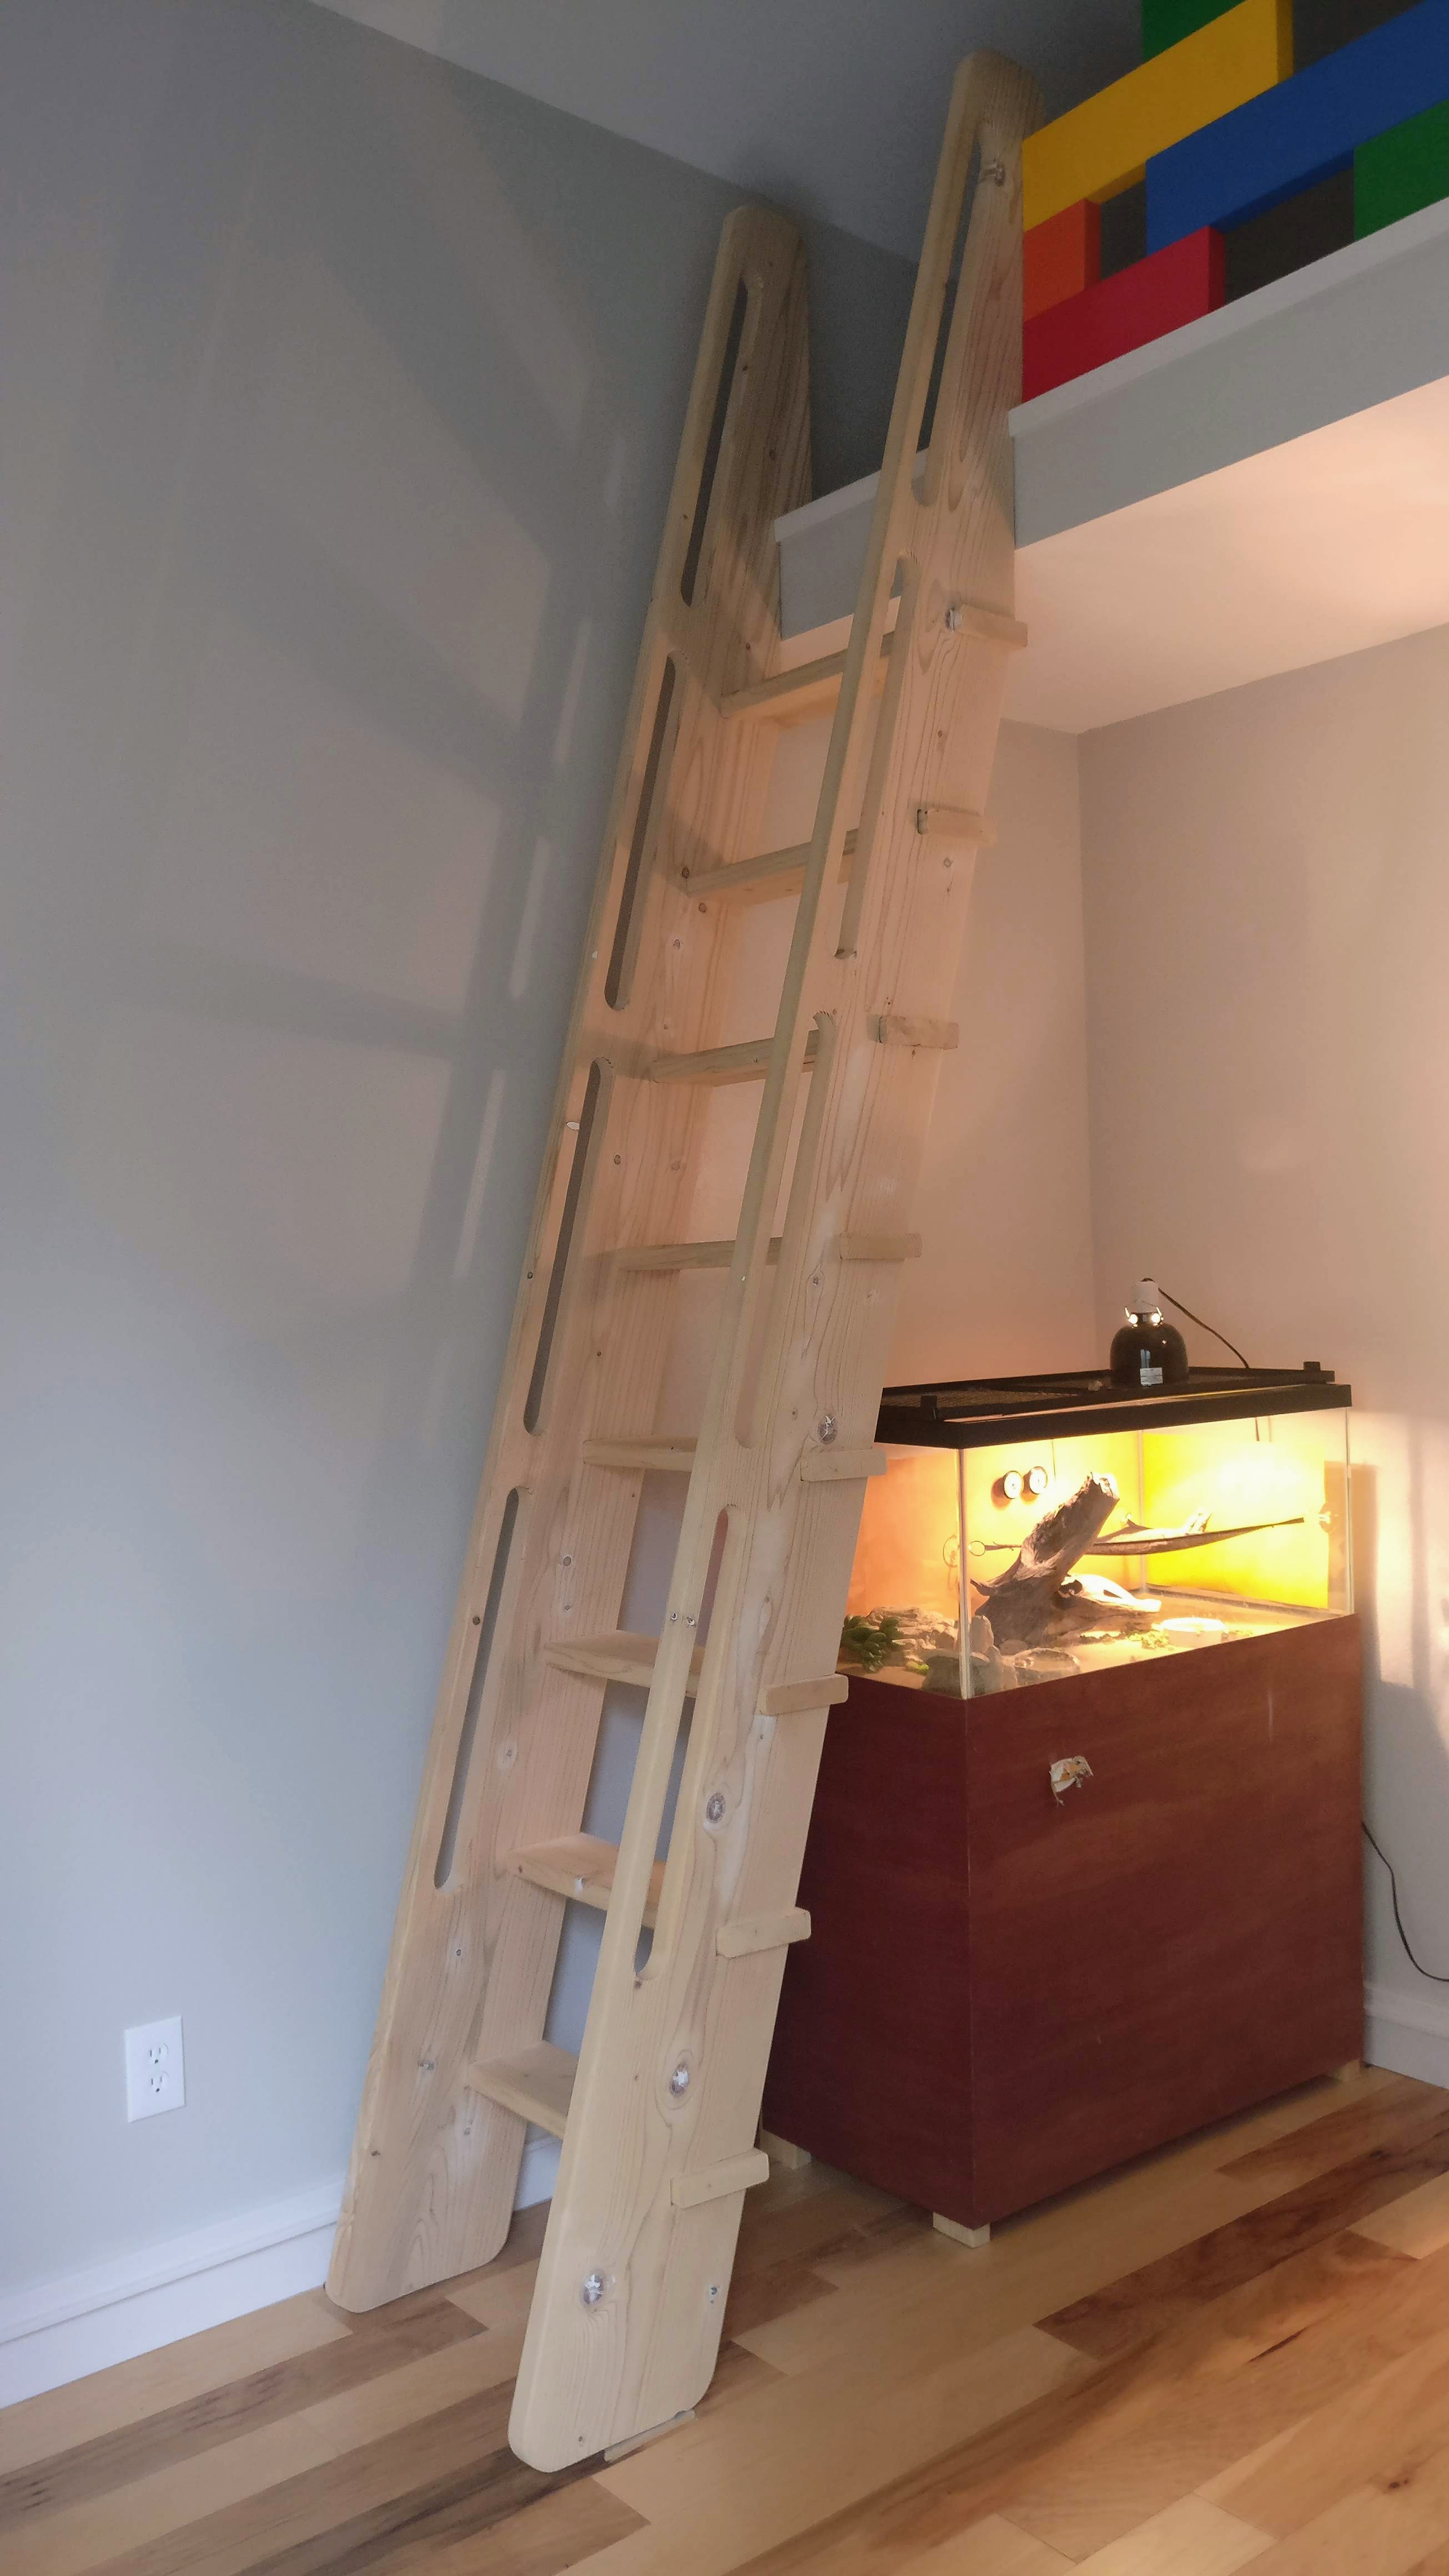
When I remodeled our upstairs, I decided to build a loft above the new laundry closet. It’s a really fun space for my son, Reece, to play. I wanted to build a cool looking ladder to access that space. This is what I came up with…
Materials
I used all pine lumber for this build. If you take your time selecting the few boards at the store, you can get some pretty nice material for this project at a reasonable cost. This ladder is also going to be painted eventually.
- Qty (2) 2x6x8 ft. pine for stairs
- Qty (2) 2x12x12 ft. pine for side rails
- Misc – sand paper, glue
Project Cost: ~$70
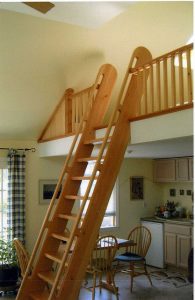
Pinterest Inspiration
Once again, I browsed Pinterest for some design concepts and I came across this…
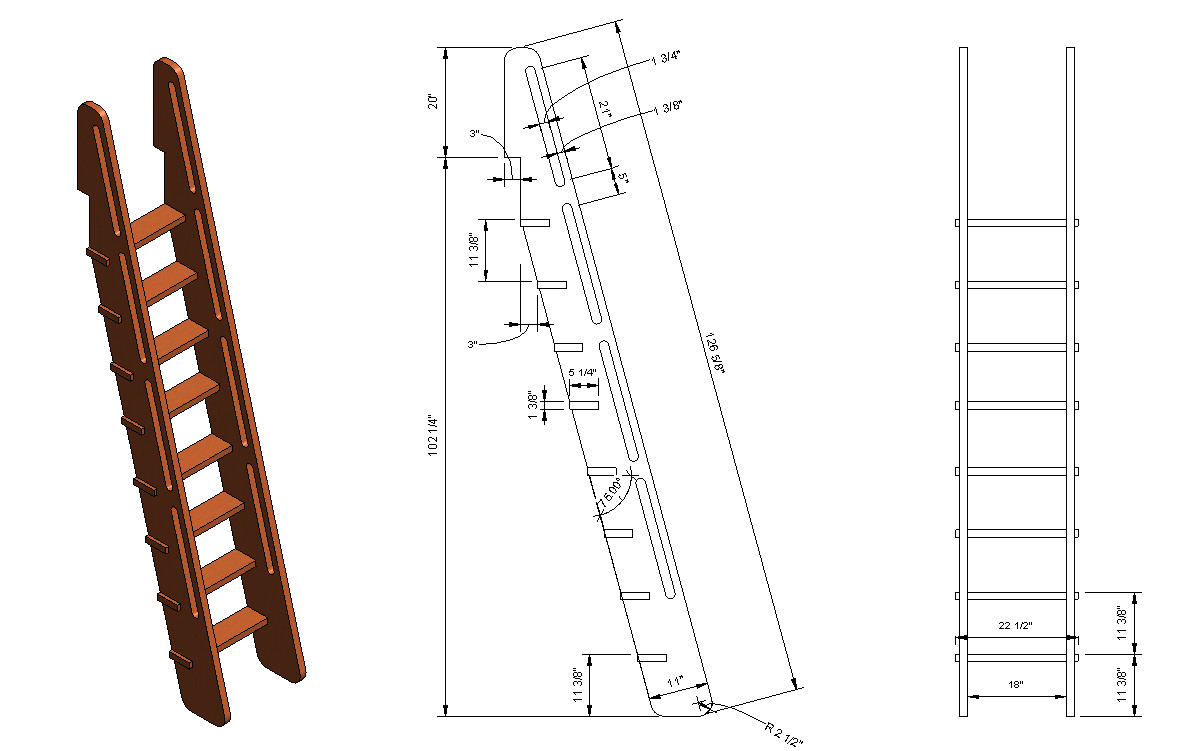
My Plan
Based on this Pinterest idea, I created the design plans. It is pretty similar, but with a bit more of a craftsman look by exposing the stair joinery.
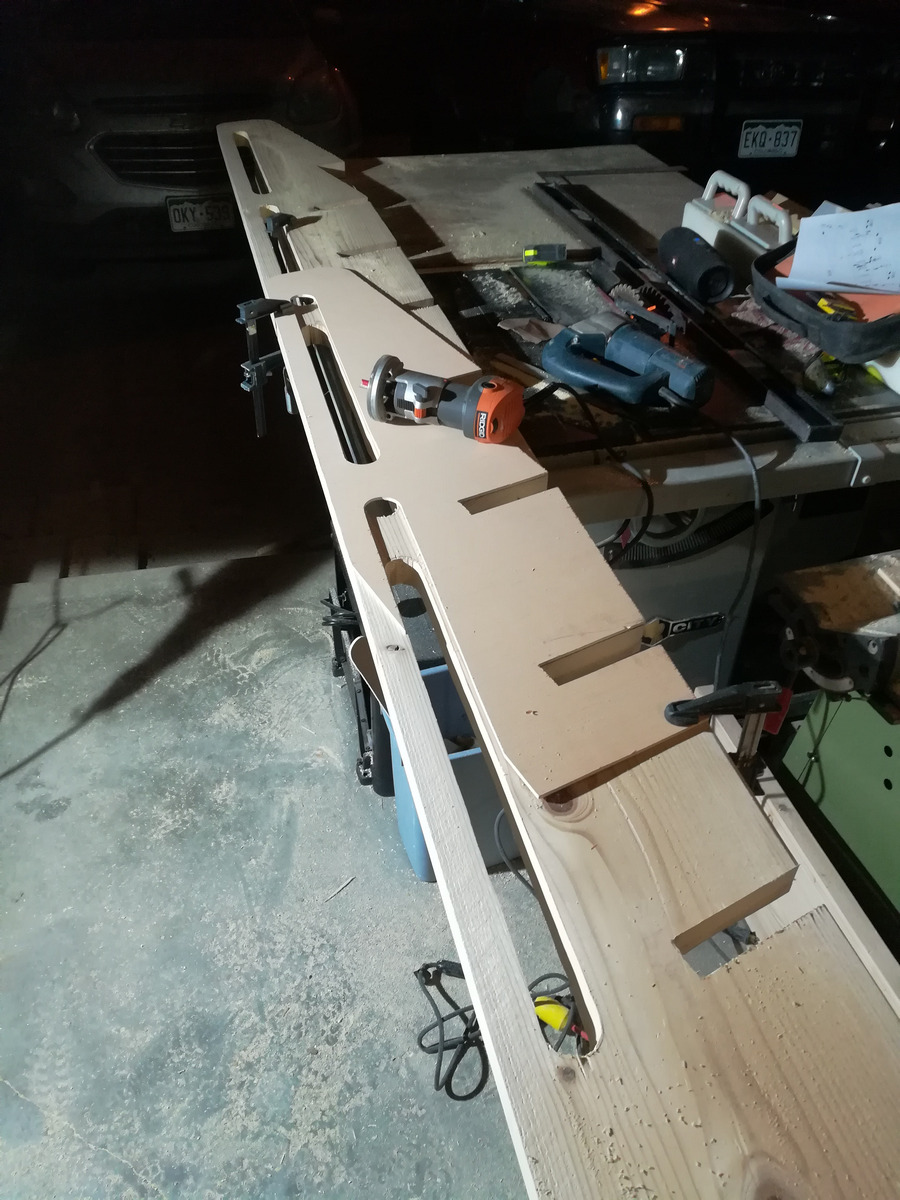
Construction
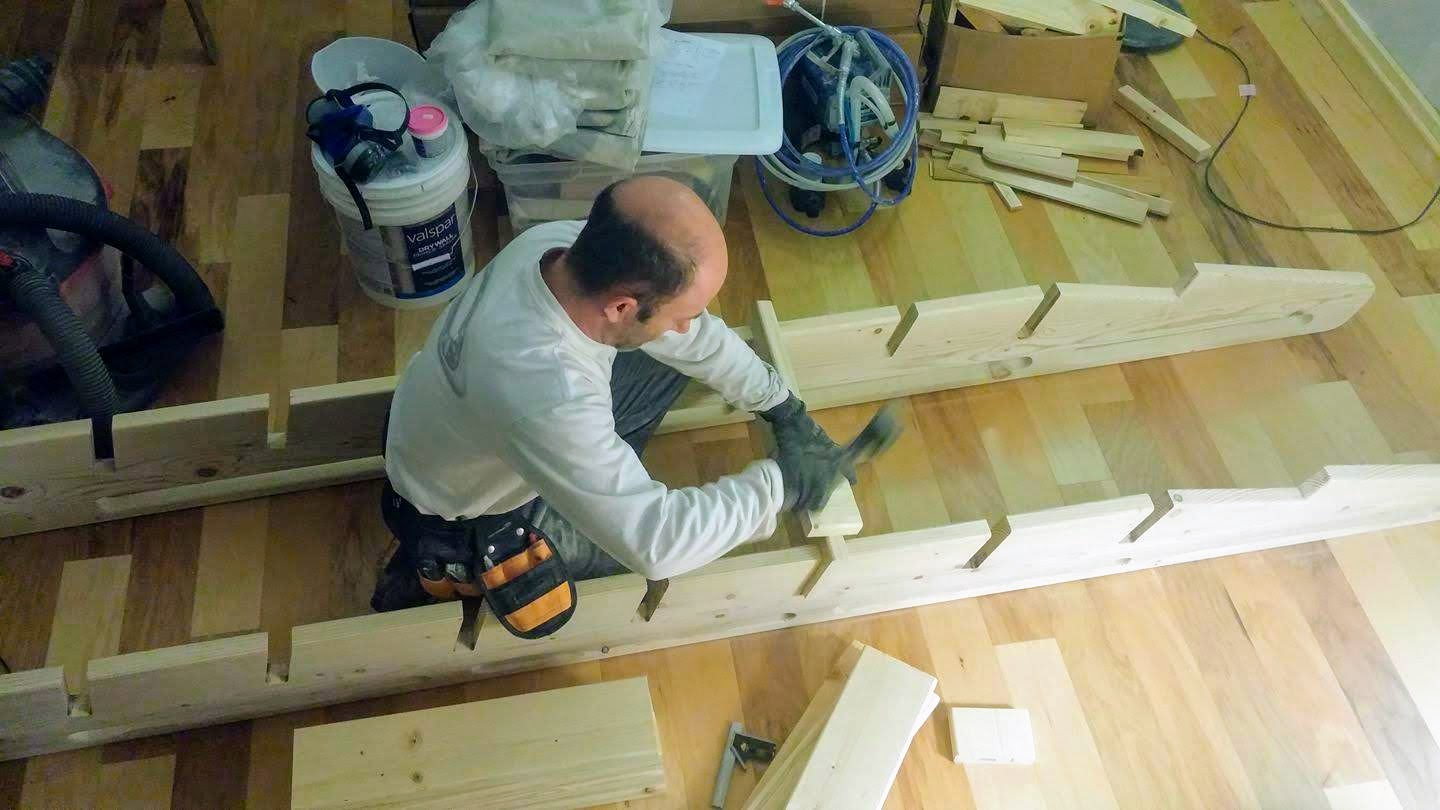
90% of the construction time for this project is cutting the two sides of the ladder. I made a template, so I could keep the spacing and notches even for all the stairs. First I just drew out everything on one board and used a drill and jigsaw to rough everything out. Then I cleaned everything up by using a pattern bit in my router to follow the template. I followed that up with a 1/4″ round-over bit along all the edges and hand holds to get rid of any sharp edges.
After the first side was done, it was just a matter of tracing this onto the second side and repeating the process. It’s not a terribly difficult process, but there is a lot of cutting and a lot of router work to be done. It took me a few nights just to get the two side rails completed!
After the sides were completed I turned my attention to the stairs. The key work here was done with my thickness planer. I planed the (2) 8 ft. 2×6’s down to the proper thickness (1 3/8″). I made it a snug fit in the stair openings on the two side rails. Removing a little material from each side, also left me with a much smoother surface on everything. After that, I cut the stairs to the final length and finished up with the 1/4″ round-over bit in the router to ease over the edges.
Before assembly, I gave everything a good sanding with the random orbital sander and some 220-grit sand paper. There were also a few knots that needed to be touched up with some wood filler to get everything smooth.
Assembly
The cool thing about this design, is that the assembly is super simple. I just put a little wood glue in each stair slot and tapped them in place with a hammer. No drilling, no nails, no screws!

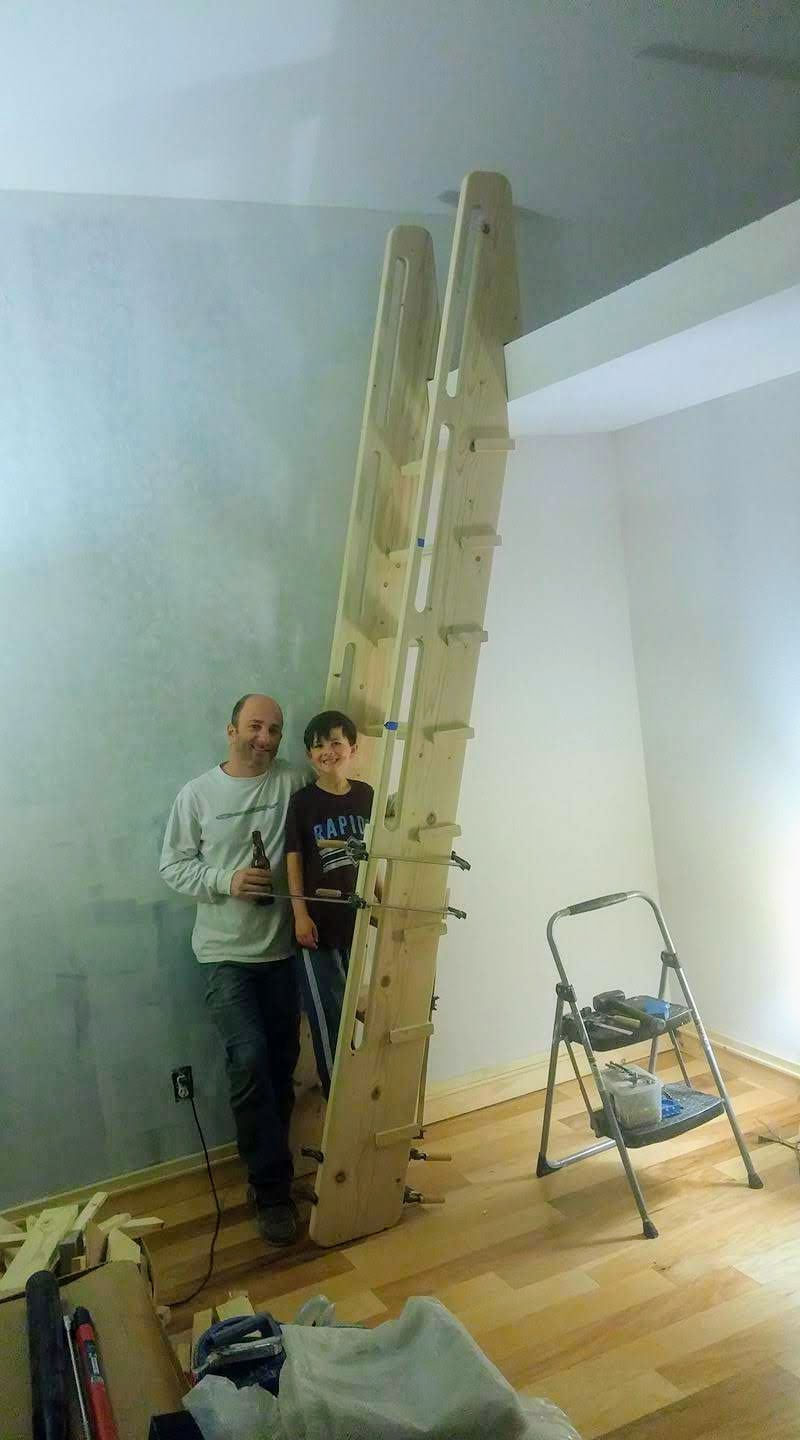
Oops! I did end up cracking one side rail during the final assembly, but it was easily repaired with some wood glue and clamps. You can see that the repair is still drying in the photo below. You can’t even tell now. Maybe one of these days, I’ll actually get around to painting it too. So many projects… so little time!
I Think It’s Pretty Cool… and Reece Does Too!
Till next time…
Ok thanks…guess I just misunderstood.
Hi Ryan. I meant how did you secure the ladder itself to the loft floor?
That was included in my response… “The stairs are secured at the top with a structural screw at an angle (pocket hole) down into the framing.”
How did you secure them in place?
The stairs are secured at the top with a structural screw at an angle (pocket hole) down into the framing. There are no screws on the individual treads, as described. They are simply glued in place.
u got plans in mm not inch Thanks
No, Sorry. It’s pretty easy to convert though. 25.4mm per inch.
It’s simple math is everyone helpless these days?
Keep up the great work! This article was exactly what I was looking for. Thank you for sharing this content regarding loft ladder.
My pleasure. Let me know if you have any questions. I’m happy to help 🙂
Reading your blog about loft ladder design and construction. It’s clear that you’re incredibly knowledgeable and passionate. Thank you for sharing your expertise in such an insightful way.
Thanks for your kind words and visiting my website. I really do enjoy the things that I write about here. I’m glad that you enjoyed it too!
[…] ryanhobbies […]