
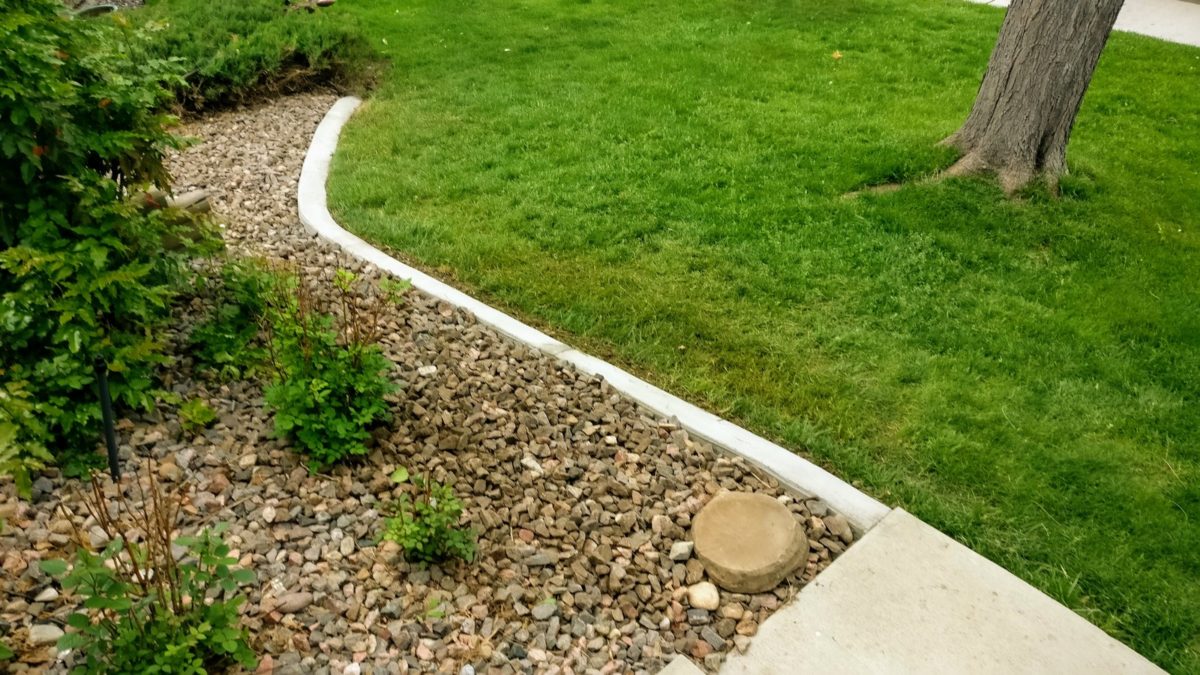
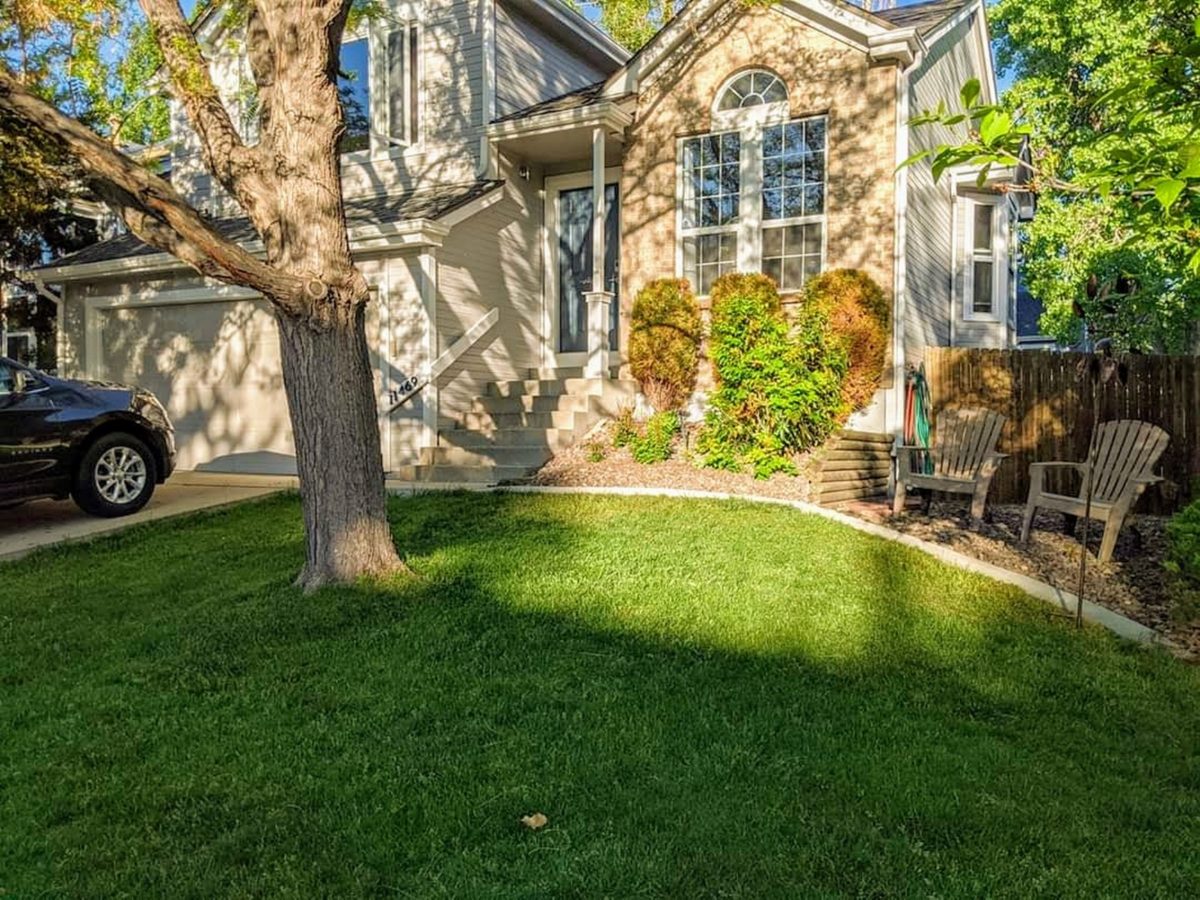
This past summer, I just got tired of picking rocks out of the yard and looking at the rusty old landscape edging in our front yard. It was time to make an improvement, so I spent a couple of days forming and pouring some concrete edging. It is a huge improvement, for cheap!
Materials and Tools
- Concrete
- Stone (optional)
- Water
- Concrete Mixer (or mixing tub and shovel)
- Shovel (w/ straight blade is better)
- Hoe
- Steel Trowel
- Edging Tool
- Chip Brush (optional for brushed finish)
- 2x4s and such are great for straight lengths
- Hardboard/Masonite is good for bending around corners
- Stakes for holding forms (I just cut some points on some scrap wood)
- Drill and screws (for joining forms together)
- Circular saw (for cutting forms and control joints)
- Diamond masonry blade for circular saw (get the right size for your saw)
The cost of this project will depend a bit on which tools you need to buy, but the basic concrete and forming materials cost me less than $50. Some DIY projects are super affordable if you are willing to get a little dirty!
Step 1: Dig it Out
Once you’ve figured out where you want the curbing, it’s time to start digging. A flat edged shovel and a hoe will be helpful.
It is not necessary to dig that deep. Just a few inches below the surrounding area will be fine. If you are going to use standard construction materials such as 2x4s, dig deep enough so the top of your form will be at your desired curb height. 3-4″ of poured concrete will be plenty strong. You also need to dig the trench a few inches wider on either side, to account for the form.
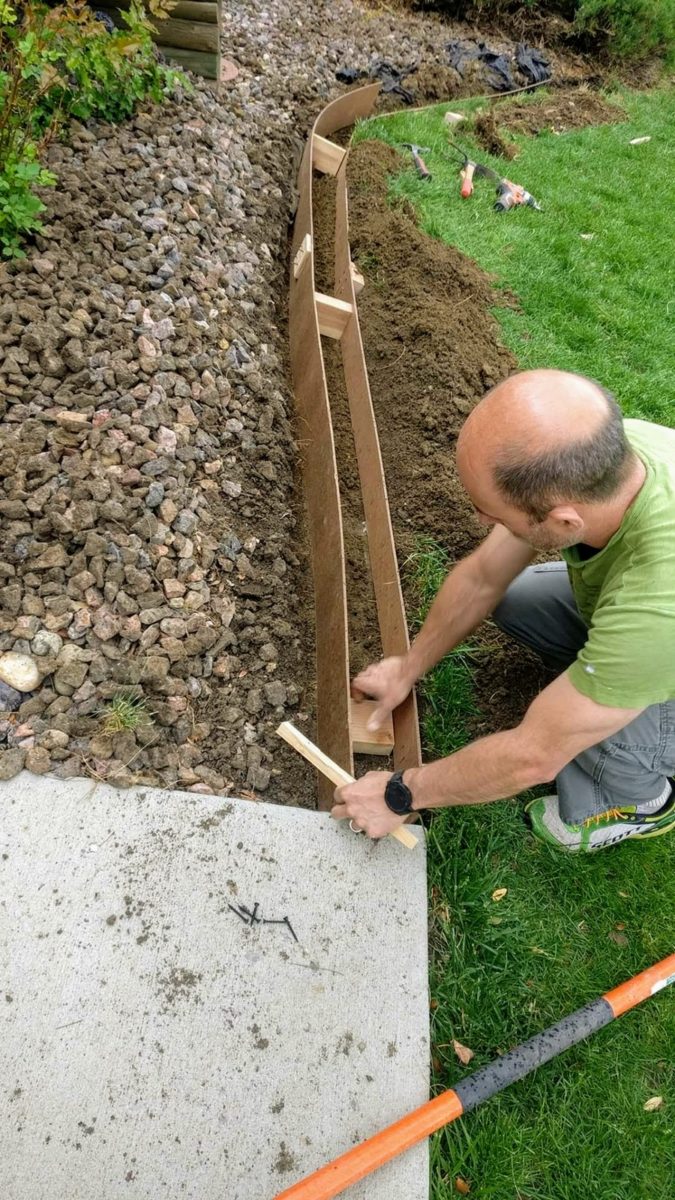
Step 2: Form it Up
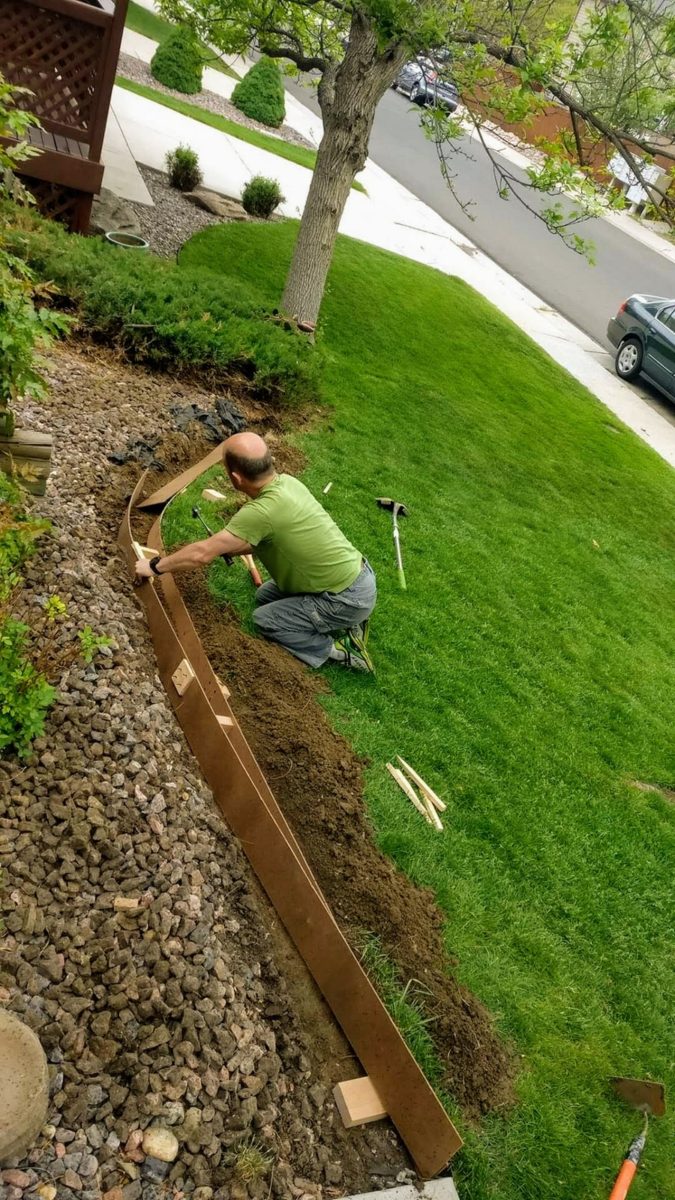
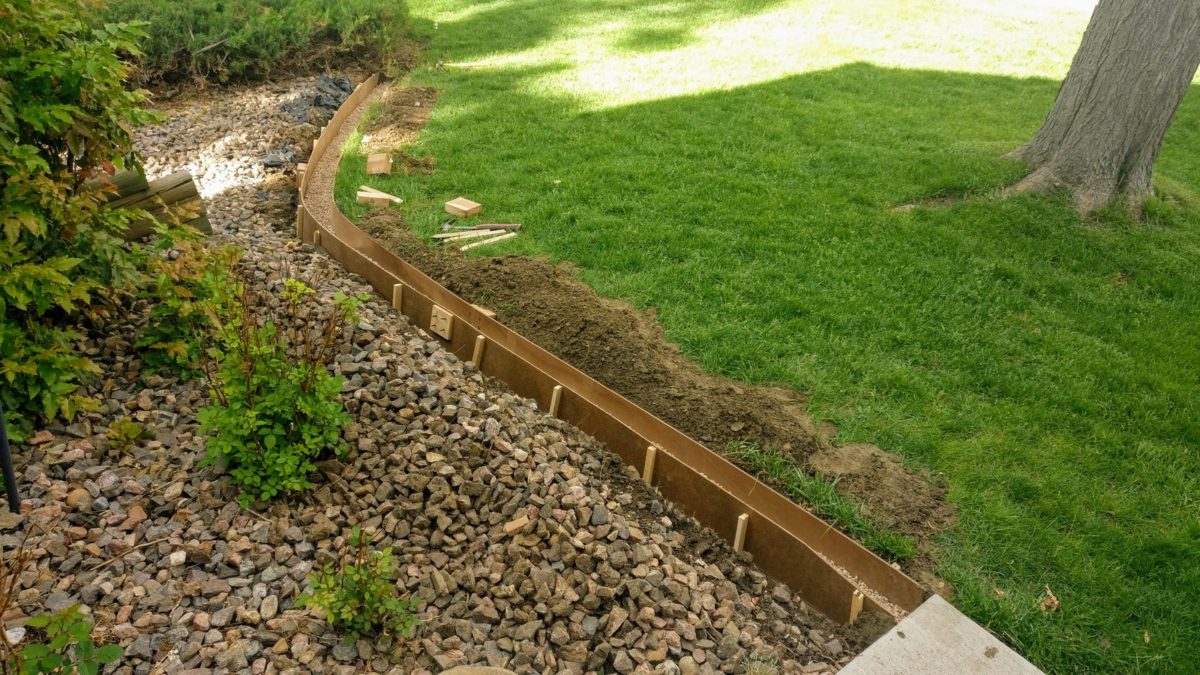
This is the most important part of the process. Use your 2x4s or masonite to shape your curbs. The top of the form will be the top of your concrete, so make sure it is positioned right where you want it. I made the back side of my curb a little higher to prevent the stones from falling into the grass from the hill. Use stakes on the back side of the form to hold things in position as you move along. Use plenty of stakes to make sure that the form doesn’t move when you pour in the concrete.
I also recommend using a spacer between the forms as you go to make sure that the width of the curb remains consistent. My curb is about 4″ wide, 4″ tall in the front, and 6″ tall in the back.
Step 3: Pour the Concrete
Depending on how smooth the bottom of your trench is or the soil conditions, you might consider pouring an inch or two of stone in the bottom and tamping that down a bit. It will help to create a solid base and fill in any unevenness or gaps in the bottom of the forms.
Now it’s time to mix up the concrete. Just follow the directions on the bag. I recommend making the mix a little bit on the wet side. You are not that concerned about the strength of these curbs and it will make it a lot easier to flow into the forms if it is just a little wetter.
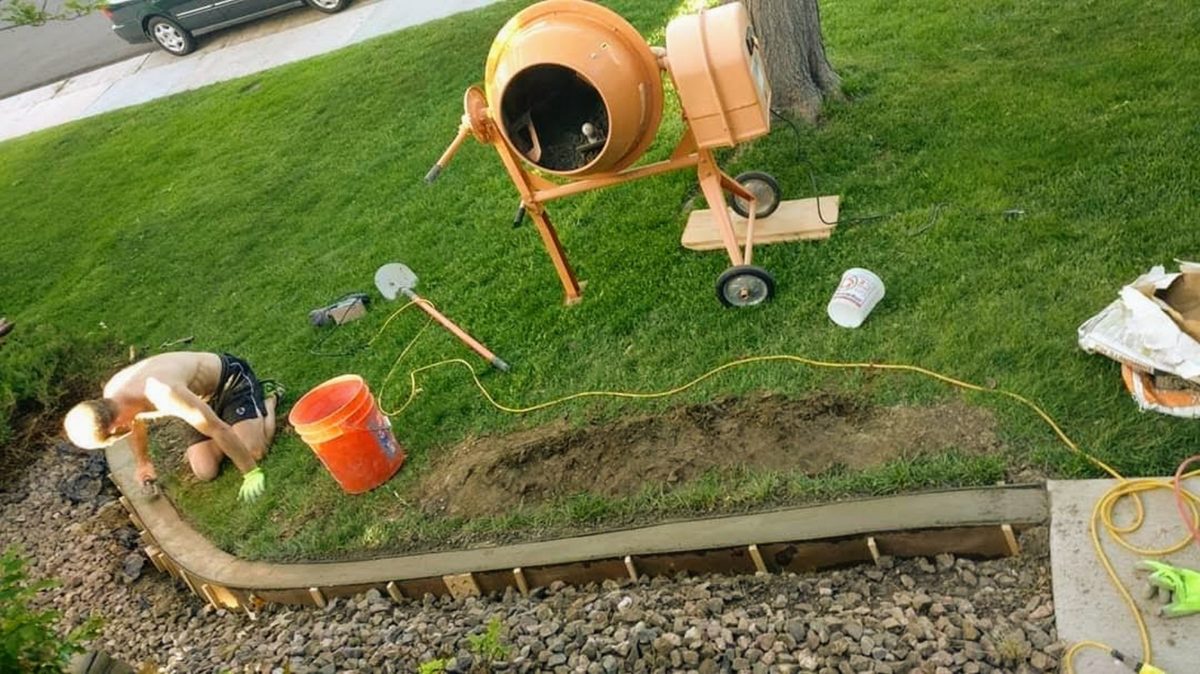
Use a shovel to fill the form with concrete. Use your trowel as you go to jam the concrete down into the corners and agitate the concrete mix in the form a bit. It’s also a good idea to band on the outside of the form with your trowel or hammer a bit to vibrate the concrete down to fill in any voids and release the air along the edges.
When the form is filled up, use your trowel or a short piece of wood to screed across the top of the form to level off the concrete. Then go back with your trowel to smooth the top of the concrete.
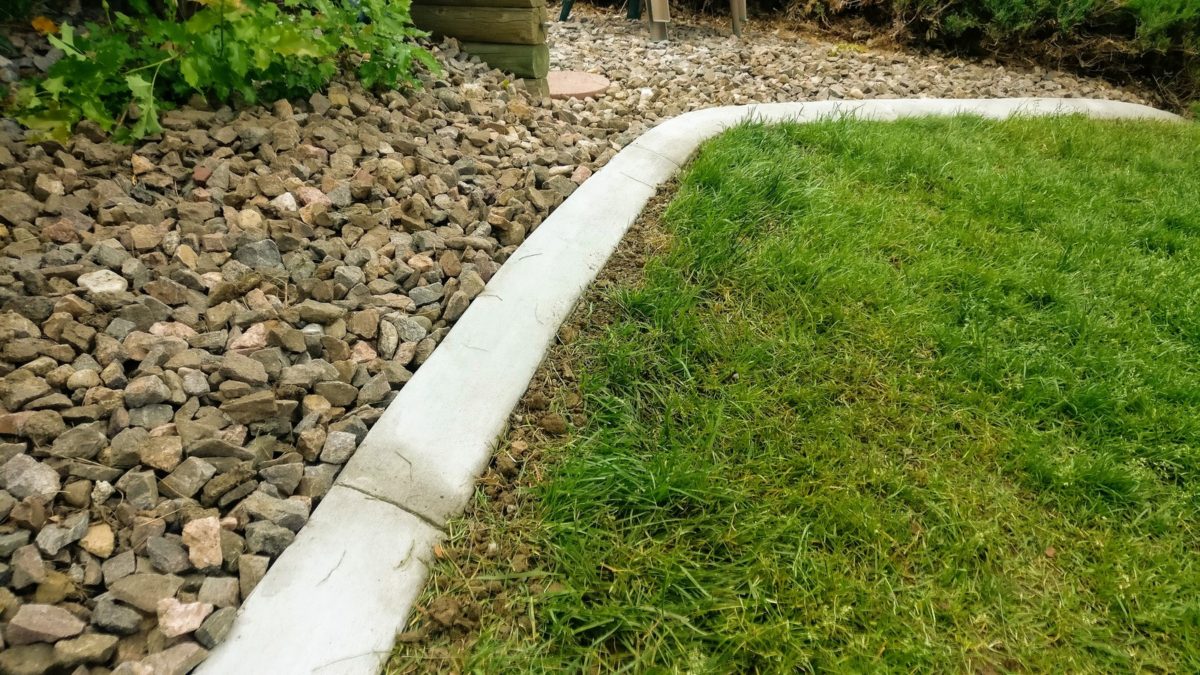
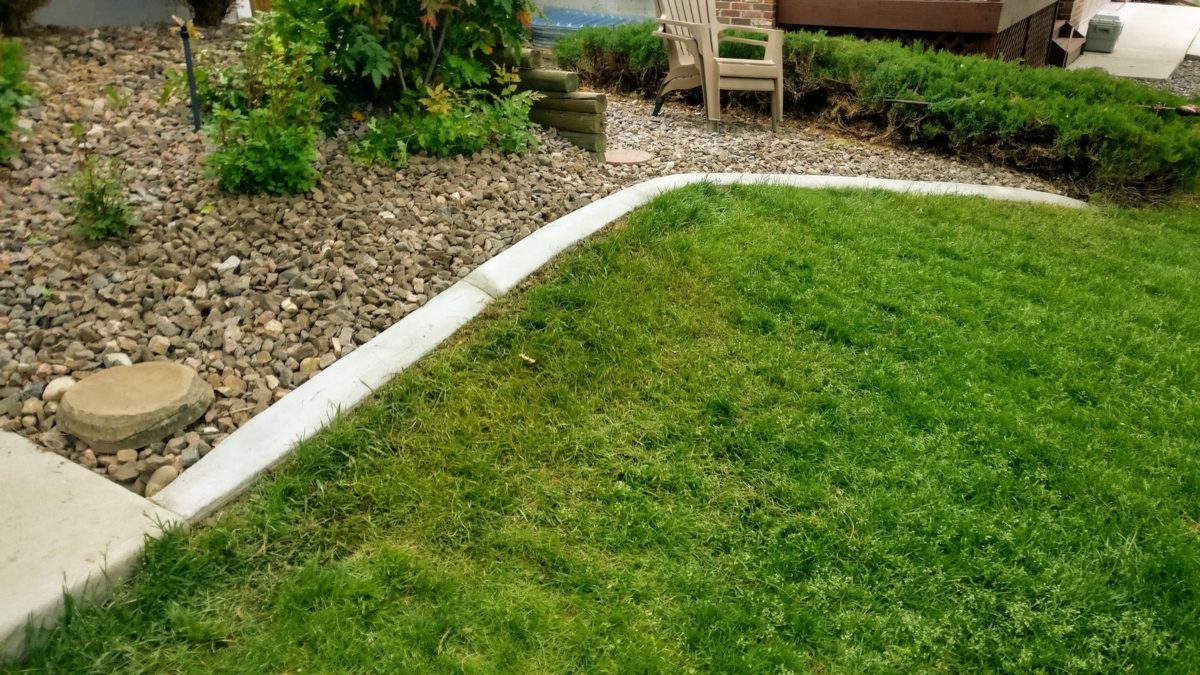
After the concrete starts to set up just a little bit you can go along the entire edge of the form with your edging tool to round over the edges of the concrete. This is a critical step to make your finished curbs look nice and feel nice (no sharp edges) when they are finished. Don’t skip this step.
I also used a chip brush after this on the surface to give a brushed finish. I like the curbs to not have a slippery feel when they are dry and it also helps to hide any minor imperfections.
Step 4: Cut the Control Joints
Control joints prevent cracks in your concrete by “controlling” where the cracks occur. Basically, by cutting the concrete into sections you are relieving future stress points in the concrete that would cause cracking. If you just left your new curb as one long piece, I can pretty much guarantee you that it will crack at some point (assuming that it is longer than 4-5 ft.). The ground will certainly move enough with the changing weather and seasons to crack it.
You can put the control joints in when the concrete is curing, but you need to do it when the concrete is at just the right firmness. I’m not that good at concrete work, so I decided to just use a masonry blade on my circular saw to cut the joints a couple of days later after the concrete was pretty solid.
Just space the joints evenly along the curb about 3 ft. apart. The saw should be set at it’s maximum depth (~2.5″) and cut a nice straight line across your curb. It’s a good idea to drip some water on the area as you are cutting to keep the dust down and prevent the blade from heating up too much. Make sure that you plug the saw into a GFCI outlet too!
Step 5: Enjoy Your New Landscape Edging
Lesson Learned
After completing this project, I’ve found some other resources talking about this same type of project. One thing that I would do differently next time is mix my own concrete with sand and portland cement. By omitting the aggregate, it would be much easier to smooth the top and edges of the concrete. This was definitely a bit of a pain. The recommended mixture of sand to portland cement is somewhere between 3:1 and 4:1.
Till next time…
[…] inside the forms, though strength requirements are not as critical for decorative lawn curbs (Ryan Hobbies). We find that following the mix directions on the bag is generally sufficient for these smaller […]
[…] According to some sources, basic materials can cost less than $50 if taken on as a DIY project (Ryan Hobbies), though professional services may be preferred for guaranteed […]
Thanks for the great DIY guide on creating concrete landscape curbing! I’m impressed with the detailed instructions and clear pictures.
One thing I’m curious about is how to customize the look of the curbing. Are there different edging tools available to create a more decorative finish, or perhaps staining options.
Thanks, Austin. There are quite a few options for customizing. If you want a different edge profile, you could put a round over or beveled piece on the edge of your forms. You could also add color pigment to your concrete mix or do an acid stain after it cures. You could probably also use a stamping roller or mat if you wanted to add some texture too.
I’m certainly not a concrete expert, but I have used color additives in the mix before and they are pretty easy to use.
I find it interesting when you said that the most important part of the process is to use a masonite to shape the curb. I think there is a certain skill needed for kerbing processes, so they will look consistent and nice to look at. Personally, I would just hire concrete contractors to do the job for me, because I know that I do not even have the knowledge regarding the right products and tools to use for my property’s needs.
It’s fascinating how landscape concrete curbing can beef up the appearance of your property and prevent cracks from affecting it. My colleague has been thinking about renovating his property to impress his neighbors and in-laws. Perhaps finding a concrete contractor can help him with this project.