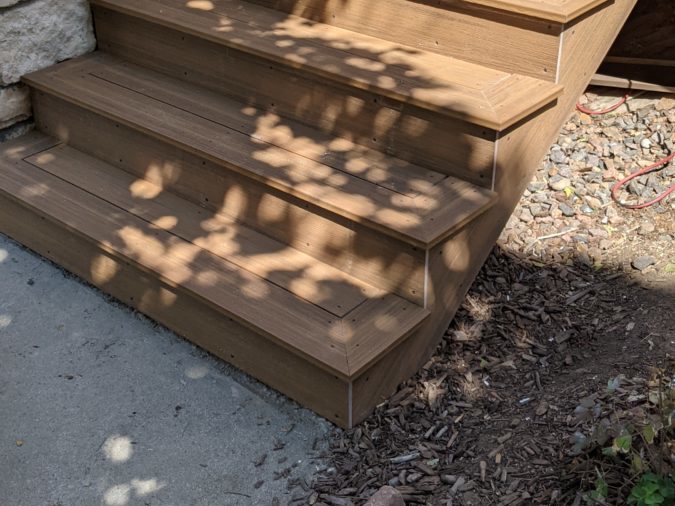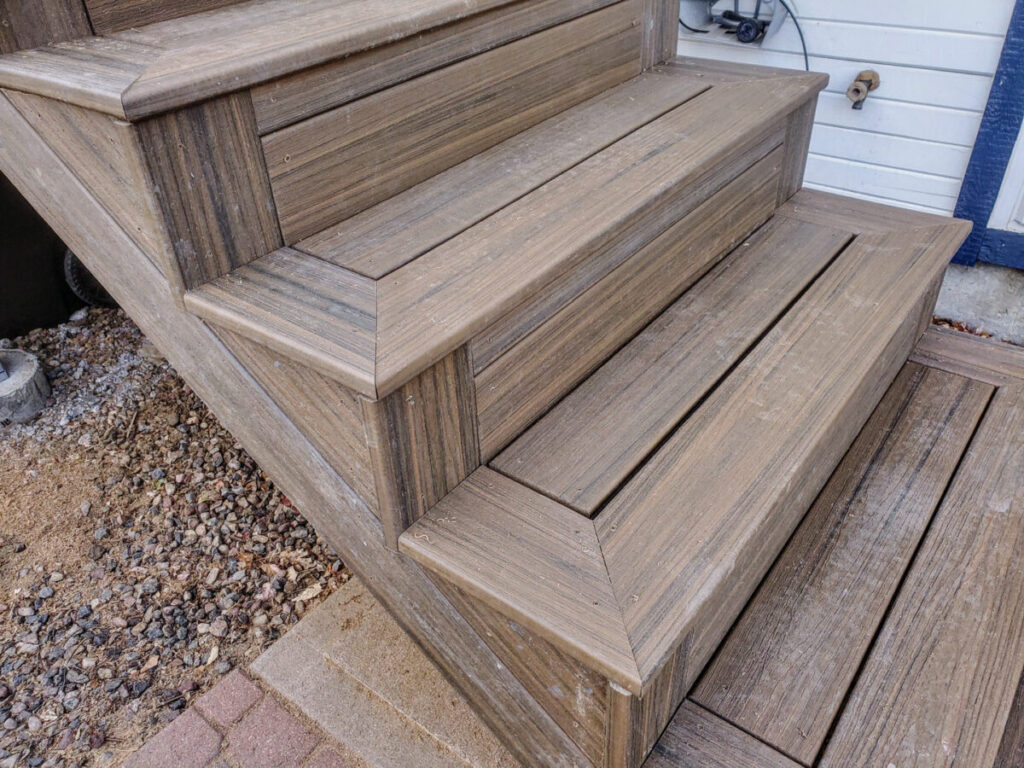
In a previous post, I discussed how to cut and install stair stringers and finish them so that you can have nice mitered corners on your composite decking stairs. This time, I’d like to add another alternative to the stair finishing technique to completely hide the unfinished edges of the stair risers and stringer fascia pieces.
This technique does involve a little more work, but it can actually be cheaper, since it eliminates the need to use composite decking fascia boards for the stair risers (Fascia boards are usually pretty pricey!).
Additionally, this post includes a couple of tips on using joist tape to increase the life of your stairs and an alternate method to attach your stair stringers at the top to your deck framing. Enjoy!
Parts List
- 2×12 Pressure Treated Lumber for stringers and blocking
- Composite Decking Material of your choice (Trex or similar)
- 3 1/2″ deck screws for securing 2×12 materials
- 2 1/2″ composite deck screws for decking attachment (matching color)
- Structural Screws for securing stringers to main deck frame or use next item…
- Simpson Stair Stringer Connectors for additional support of top stair stringer attachment
- Simpson Connector Screws or Simpson Connector Nails for above stair stringer brackets
- 3/8″ x 3″ Galvanized Screws for leveling stringers
- Joist Tape to seal the exposed edges and joints between the blocking
Recap of Previous Post
If you haven’t already checked out my previous post on how to build composite decking stairs, you should definitely head over there for all of the details. This post will only be an add-on to what was already discussed there including:
- Measuring and cutting stair stringers
- How to secure and support the top and bottom of the stair stringers
- Special blocking requirements
- Installing the risers
- Cutting the mitered stairs
Original Method vs New Alternate Method
The original stair construction method that I described, used 1/2″ fascia boards for the stair risers. That made it pretty easy to install, since you just cut them to size and screw them on. However, there are a couple of downsides to this technique. First, these fascia boards are ridiculously expensive and can cost 3-4x what a normal deck board costs. I have no idea why, since there is actually less material! Second, you still end up with a cut end of the board that is visible and is not the same color as the exterior of the board. It’s really only a visual thing, and there’s no concern for rotting since it is still composite material, but I still don’t love it.
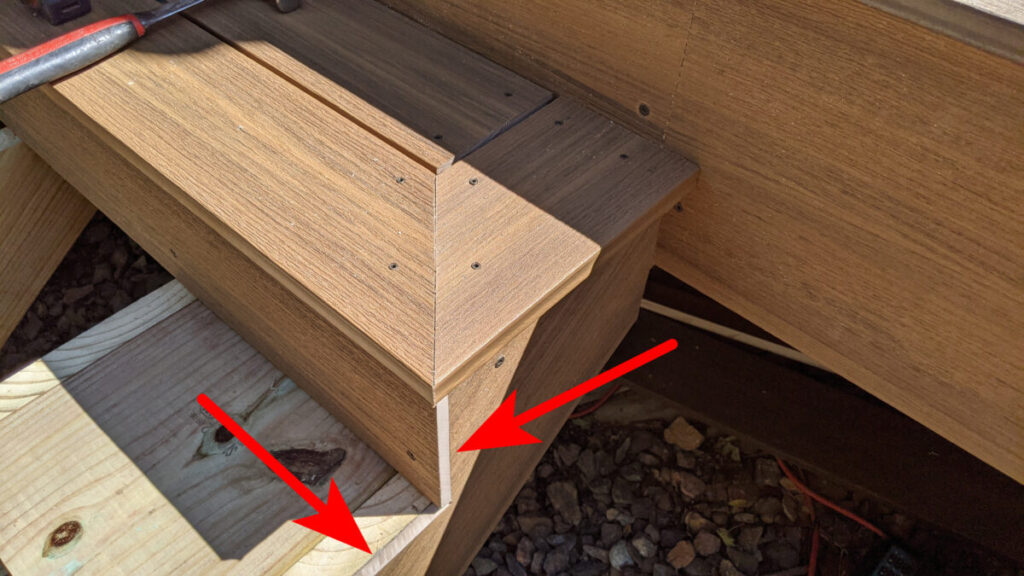
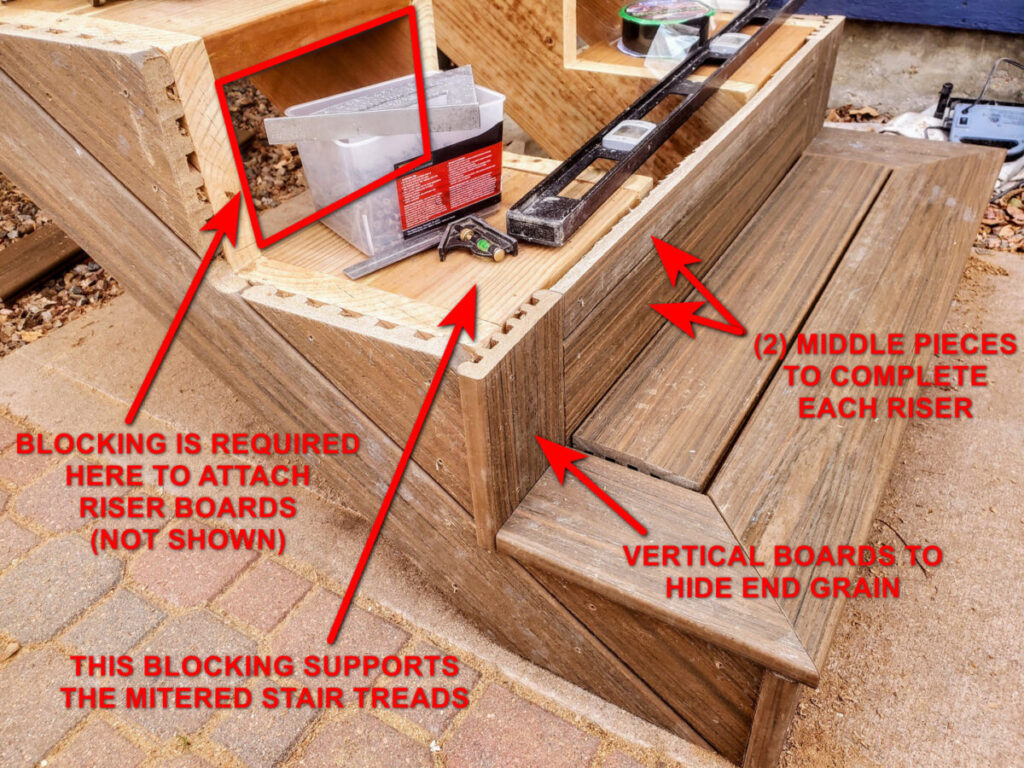
The alternative method that I’d like to talk about here is to use standard decking boards instead and also to add a vertical board on each end of the risers to visibly hide that end grain. You will need to add more blocking to get a good nailing surface for these boards and rip one of the middle boards down to the correct width to fill the exact height for your risers. The result looks pretty cool though… at least that’s my opinion.
Blocking, Blocking, and More Blocking
The major downside to this alternate method is that it requires lots of blocking to support the original mitered corners and now additionally the riser vertical end boards and middle boards. None of these boards begin and end on the stringers, so they need something solid behind them to attach to.
Of course, the second downside is that you’ve now replaced one riser board with (4) separate deck board pieces to create each riser. That’s quite a few more cuts. I think that the extra effort is worth it for the finished look though. If you’ve built the stringers well, your cuts should be very repetitive also, so it’s not that big of a deal to just batch cut a bunch of boards and then screw them all in.
You’ll also notice in the photo below that I used (2) standard deck boards to cover the sides of the stringers also. Again, this just saves a few dollars in material and still gives it a nice finished appearance.
Now It Looks Professional!
In my opinion this is a great method to make professional looking stairs. Just look at the results! … and yes, a railing was also added later. 🙂

Joist Tape To Protect Your Stringers

I didn’t discuss using joist tape in my previous post about stairs, but i did mention in it in my discussion regarding framing for a picture framed border. I do think that it is a great way to extend the lifetime of the framing beneath composite decking, and it’s pretty cheap, so it seems like a no-brainer to me. Water is the enemy of any decking project and this should definitely help seal things up to prevent rot.
I’d definitely recommend at least taping any end grain and horizontal joints between the stringers and blocking where water might be able to collect and slowly rot your wood away. I generally just tape almost all of the stringer edges and blocking beneath the composite decking where any moisture could get trapped. It’s cheap insurance.
Joist tape comes in rolls that look like black tape and it’s super sticky and stretchy. It will stick well to the wood and also seal the screw holes because of the elasticity.
Another Way to Attach Stair Stringers
In my previous discussion, I described a way to connect the top of the stringers by extending the bottom of the framing and using structural screws as shown in the picture below.
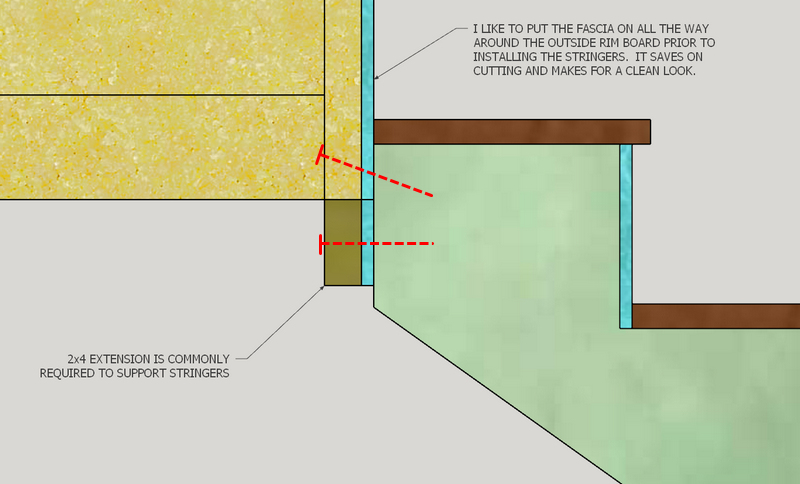
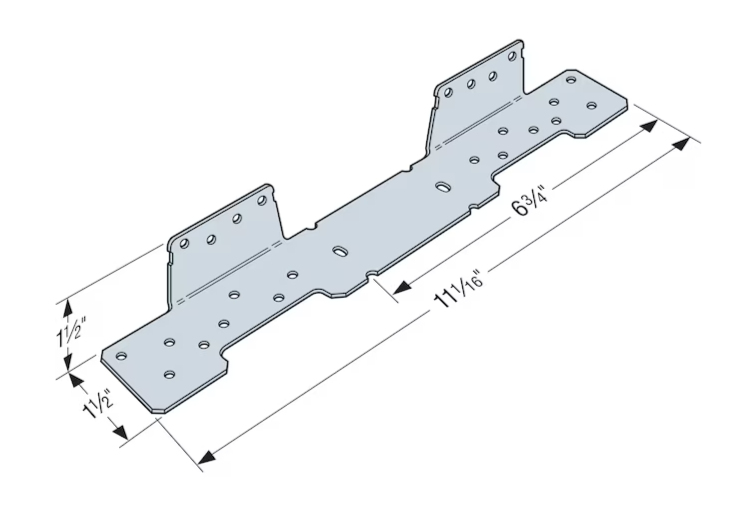
I’ve since, found an even easier way that is a bit more foolproof for DIYers. These Simpson stair stringer connectors are easy to nail onto the face of the framing and the bottom of the stringers. They provide a super strong connection with no messing around.
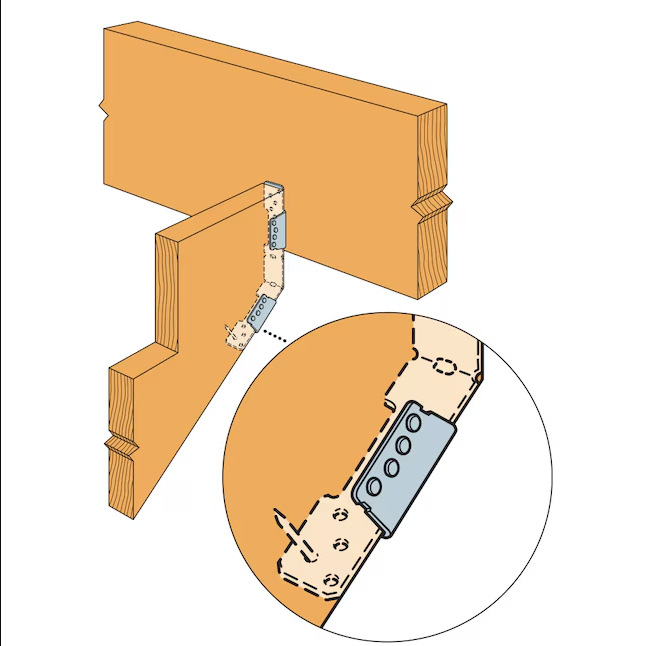
PRO TIP: Make sure that you use the correct screws or nails for these hangers or they will not be as strong as they are designed to be.
Till next time…

