
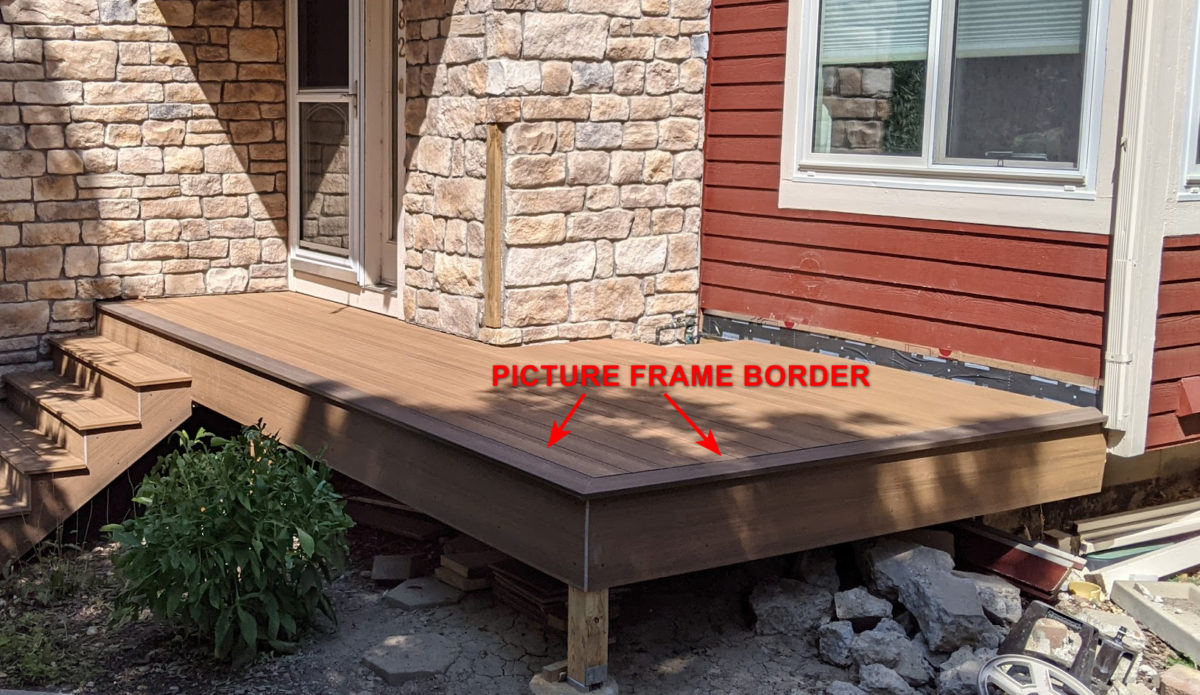
I really like the look of a deck that has a picture frame border around the outside. It gives the deck a much more professional look.
It does require some forethought though. Specifically, the framing that supports the border and interior deck boards must account for this layout so the top deck boards are all properly supported.
What is a Picture Frame Border?
A picture frame border is simply a border around the edge of the deck with mitered corners. It gives the deck a more professional look.
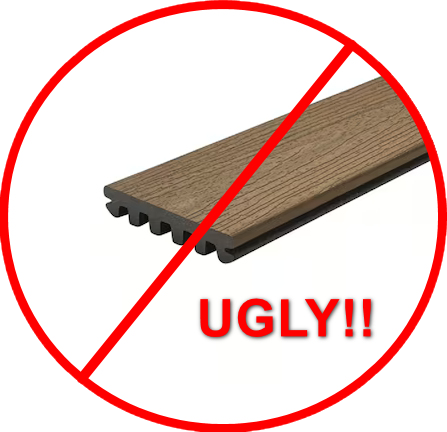
This design is extremely beneficial for modern composite decking, as it hides the ends of the main deck boards that often have an undesirable profile. Check out my other post over here that discusses this in more detail.
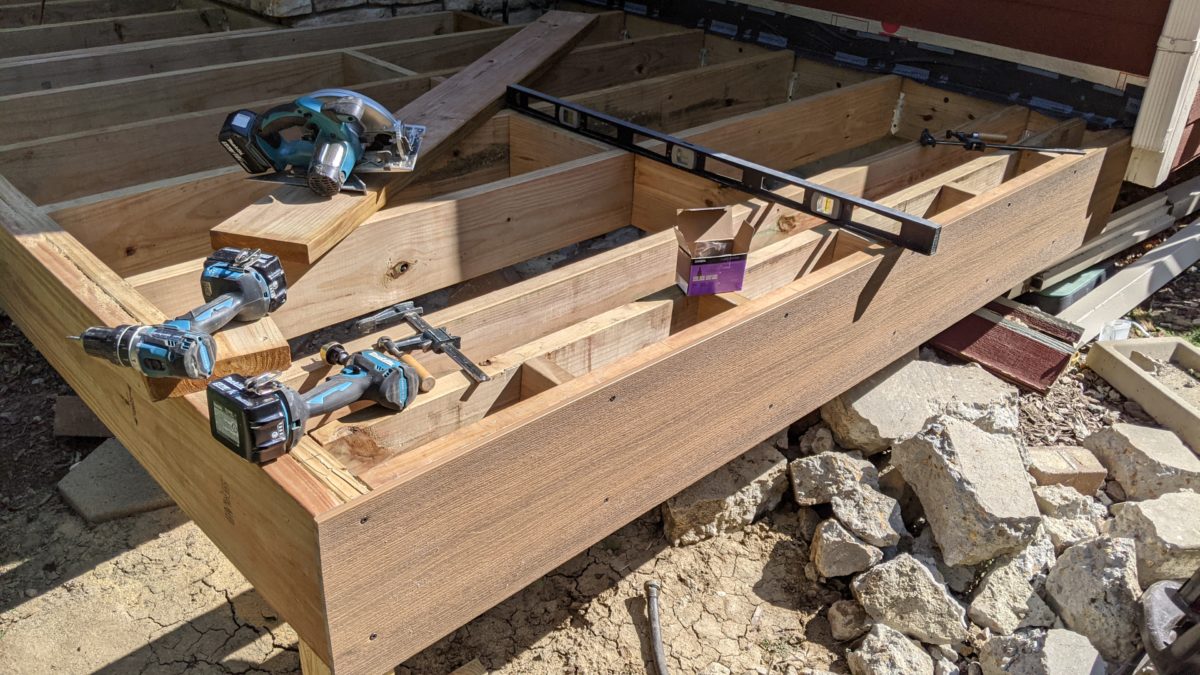
Basic Deck Framing
First, let’s look at a basic deck design. This will help you to understand the basic construction techniques. These same basic techniques can be applied to more complex deck shapes, with some minor changes.
A basic deck frame might look something like the image below with joists spaced apart every 16″ on center to support the top deck boards that are running in the opposite direction.
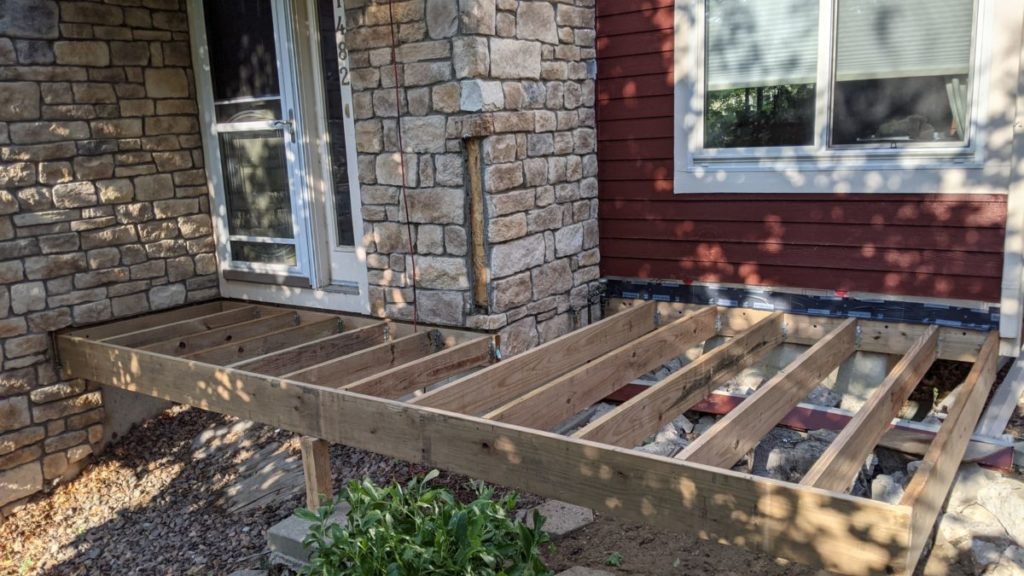
Basic Framing – 16″ OC
Special Framing Considerations
Next, I’m just going to discuss the basic layout of the additional framing that I use to provide proper support of the main deck boards and the outer picture frame boards. This is not the only way to do it, but I chose this specific framing design for a couple of reasons:
- It allows for good drainage between the framing boards to help prevent framing rot
- It prevents debris buildup between the deck boards.
I’m not going to discuss the framing lumber sizes as part of this article. That is a separate discussion all together. There are many factors that influence this decision and some engineering may be required.
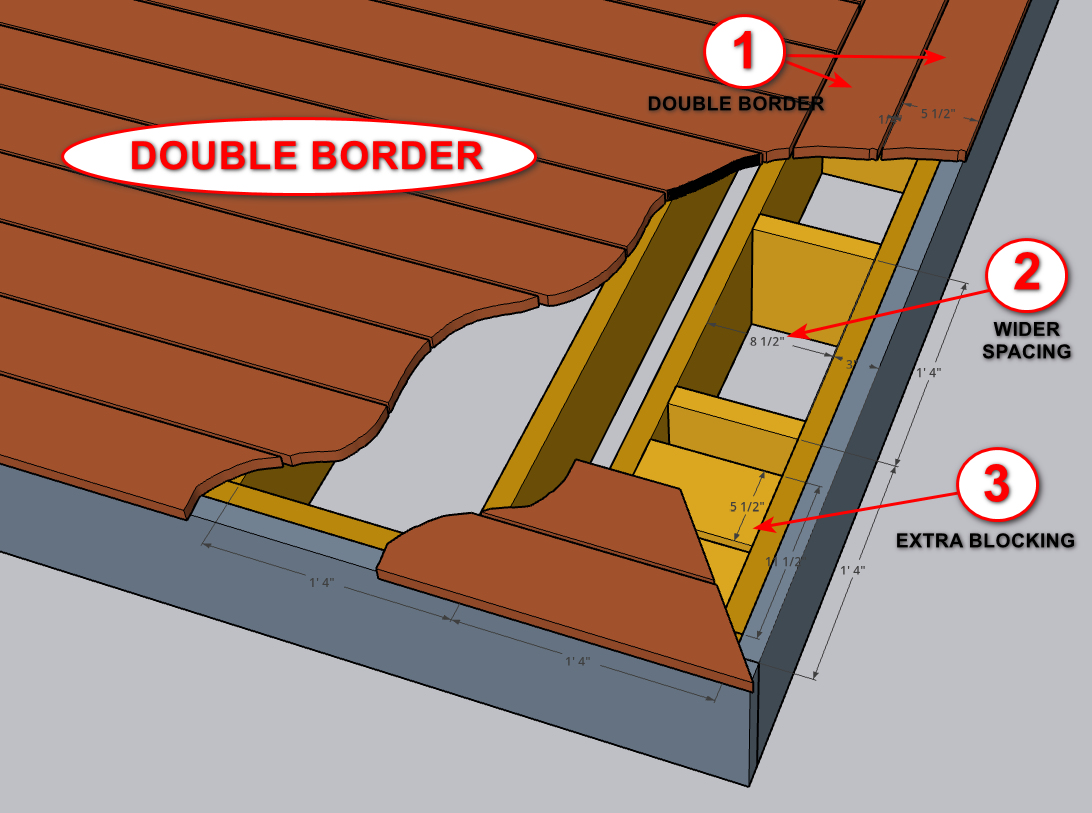
There are (3) framing components that need to be added to the basic framing design to support a picture frame border decking layout:
- Support structure for the end of the main deck boards (that will now be cut shorter)
- Support for the picture frame board that runs perpendicular to all of the other boards
- Support for the mitered corner of the picture frame border
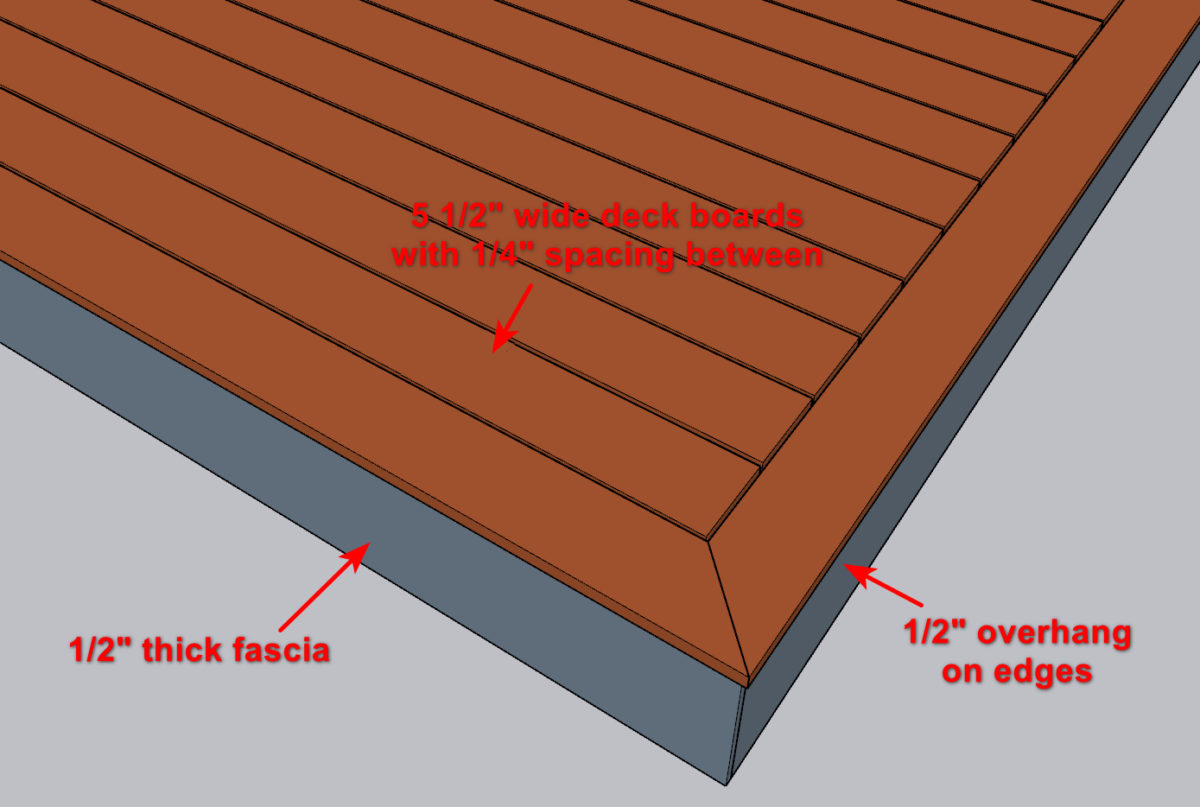
Here is a cutaway view of a typical deck corner that shows how these (3) things are accomplished.

The dimensions shown above are typical for a composite deck that uses 5 1/2″ wide boards, 1/2″ thick fascia boards, and has a 1/2″ overhang on all of the outside edges. If any of these dimensions are different for your deck design, just position the added joist such that it is inset from the end of your main deck boards about 1 1/2″. That leaves a nice gap for water and debris to clear out, but still provides good support for the end of the deck boards.
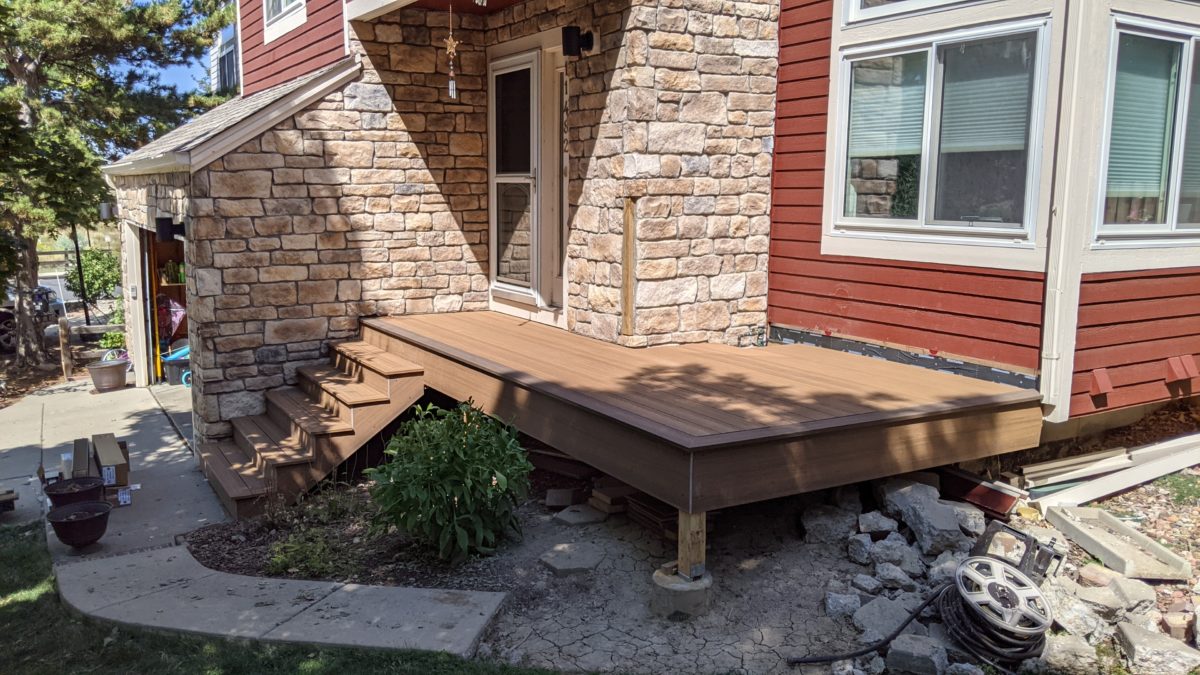
This is what the finished deck would look like…
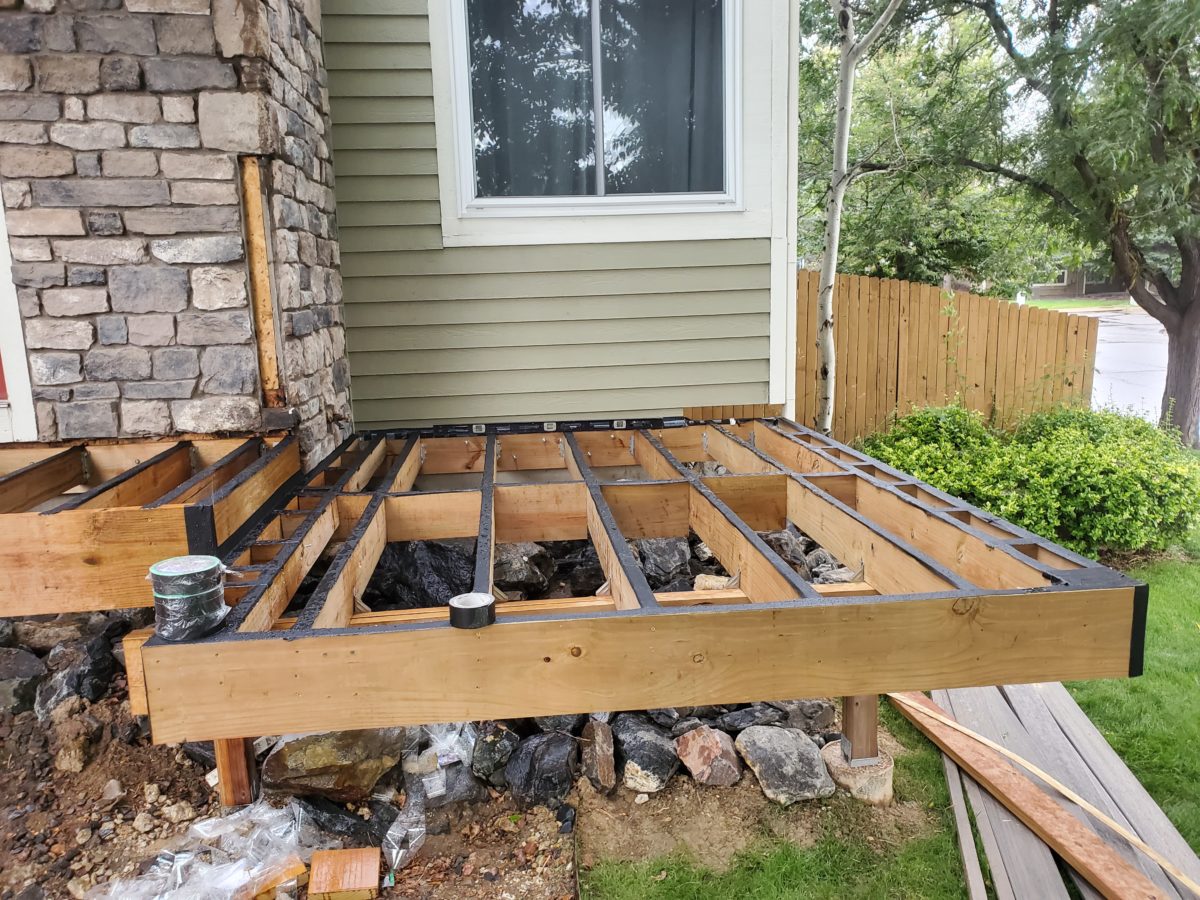
Some Real World Examples
Here are some real world examples of what this looks like.
This is the framing…
This is the finished decking…
And here is another framing example for a deck that has picture framing on two sides (left and right). This also shows what the framing looks like after adding the joist tape. Joist tape is just another layer of protection to help with rot prevention. This is the stuff that I use.
Good luck with your project and let me know if you have any questions.
New! Double Picture Frame Border
A few people have asked about a double picture frame border with two borders all the way around. Here’s the details on what that would look like. This example also uses 1 1/2″ thick fascia, since it was designed for redwood decking material, but you could adjust it, if needed. Don’t forget the extra corner blocking to support the miter also.
Till next time…
Nice — thanks for sharing — The images are great!
I think your main point besides the support of the picture framing is to provide drainage for the ends of this inside field so the added joists are just shy of the ends of the those boards leaving a 1/4” space along all the edges.
So for a double picture frame layout around the rim joist , the ladder design should be at 4.1/2″ plus another 5.3/4″ which would be 10.1/4″ ??
Paul, I’m not sure that I understand your question. Did you look at the last picture in the post above? I’m not sure exactly which dimension you are referring to.
If using picture frame with 1/2″ overhang, is it necessary to use pvc spacers between the rim joist and 1/2″ composite Fascia? Thanks
John, I believe that this is exactly what my drawings are showing. No spacers are necessary.
Does anything change with this if you’re not using composite? I’m going to be DIYing a 16×16 ground level floating deck with a breaker board and picture frame. I am going to be using standard decking boards and 2×6 for my framing structure. I’ve never done anything like this before but I’m pretty handy and doing my research before I get started in a few days.
Question about the boarder using two board picture frame. You said to move it 5 3/4 inches further in? How much spacing are you leaving in between boards? I have redwood decking boards 5 1/2 inches wide. I’m coming up with a different number. Just double checking if I’m thinking right about this
Thanks for your comment, Peter. You inspired me to add another image to the post to describe the framing for the double border look!
Your pictures are the simplest and most helpful I’ve found on picture frame blocking. Thanks, Ryan. Any tips for adding the blocking required for a top mount aluminum railing?
Thanks. I’m glad it helped. Blocking for Railings are pretty specific to your layout. My only tip is… when in doubt add a little extra blocking where you think you might need to anchor something in the future. It’s much easier to put blocking in before the decking is on top!
Good information. I am diying it myself for our house in the backyard. Wondering if you repeat another joist at 4 1/2 and make another ladder side by side for double.
No. If you wanted a boarder that is two boards wide, you would just move that one joist 5 3/4 inches further in to account for the extra board and the space between them.