
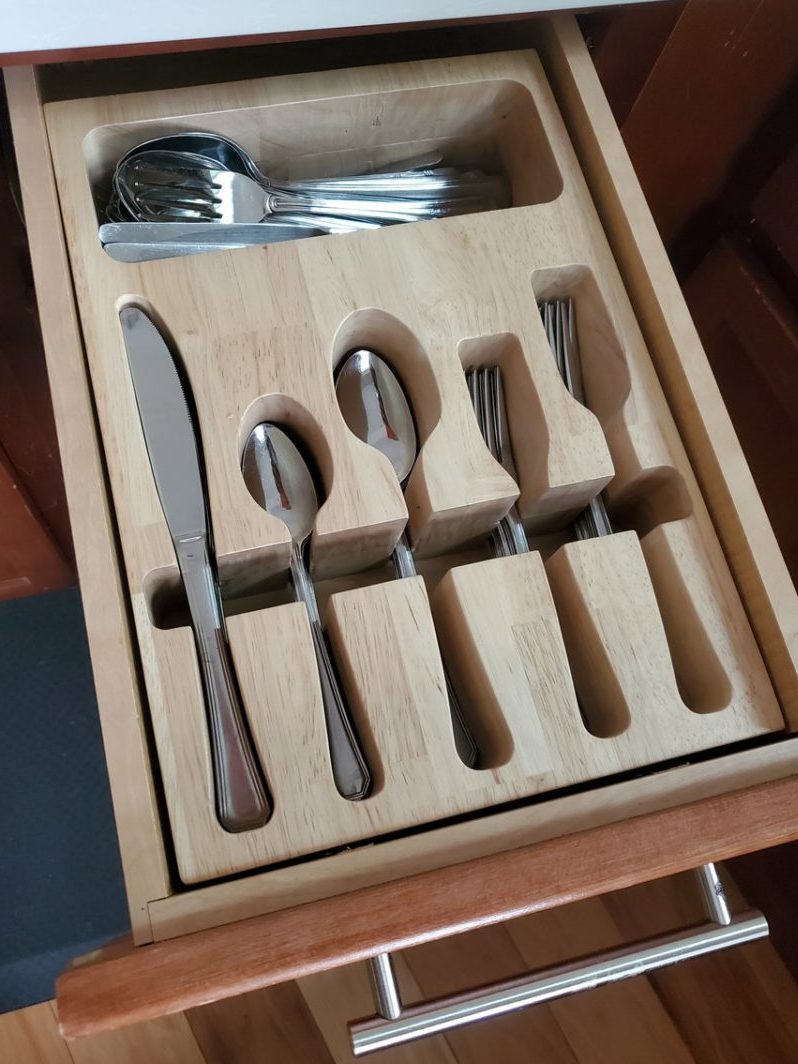
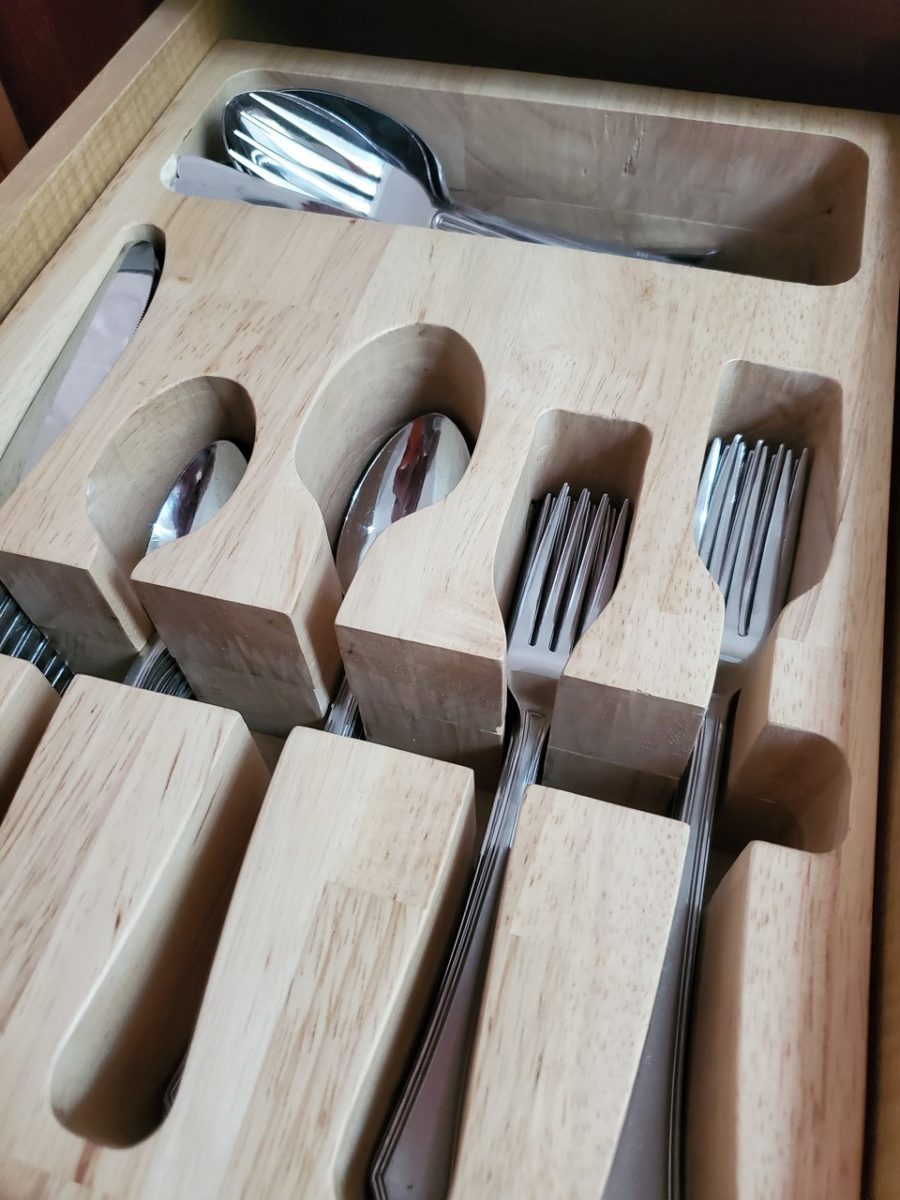
I designed and built this new silverware organizer from some leftover butcher block material that I had. It’s customized to fit our silverware, and the drawer that it goes in, perfectly. I was tired of that old plastic cheapo silverware holder that we had!
Measuring Things Up
The first step in the process was measuring up the drawer and the silverware to come up with a layout for everything. Measuring up the drawer with a tape measure was easy enough, but how do you get a smooth outline of the silverware?
You could just trace it on the wood, but I thought it would be a bit better to cut an accurate template first with my laser cutter. That template could then be used with a template router bit to cut the design from the butcher block material.
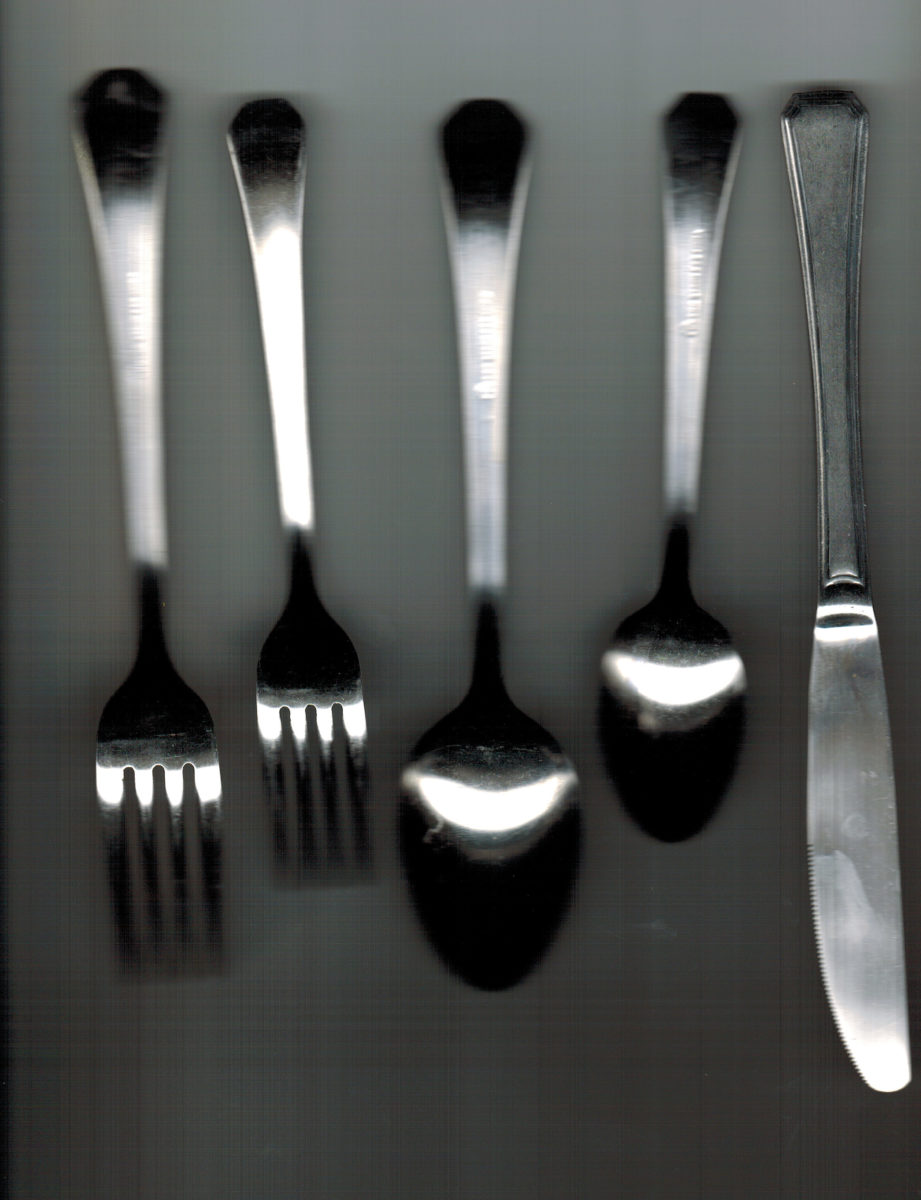
To get an accurate outline of each piece of silverware, I put it all on my flatbed scanner and scanned it. This gave me a nice starting image that also had the correct scale. You could also take a picture from directly above, but then you would also have to scale this image to the correct dimensions somehow.
Creating a Template
The next step was to create a cutting path for my laser cutter to cut the template. Usually, I like to use Inkscape for this. It’s a free program and it’s pretty easy to use to create vector drawings (.svg) that can be directly imported into my laser cutter software (K40 Whisperer). This time though, I decided to use AutoCAD, since I had been using it earlier that day for work.
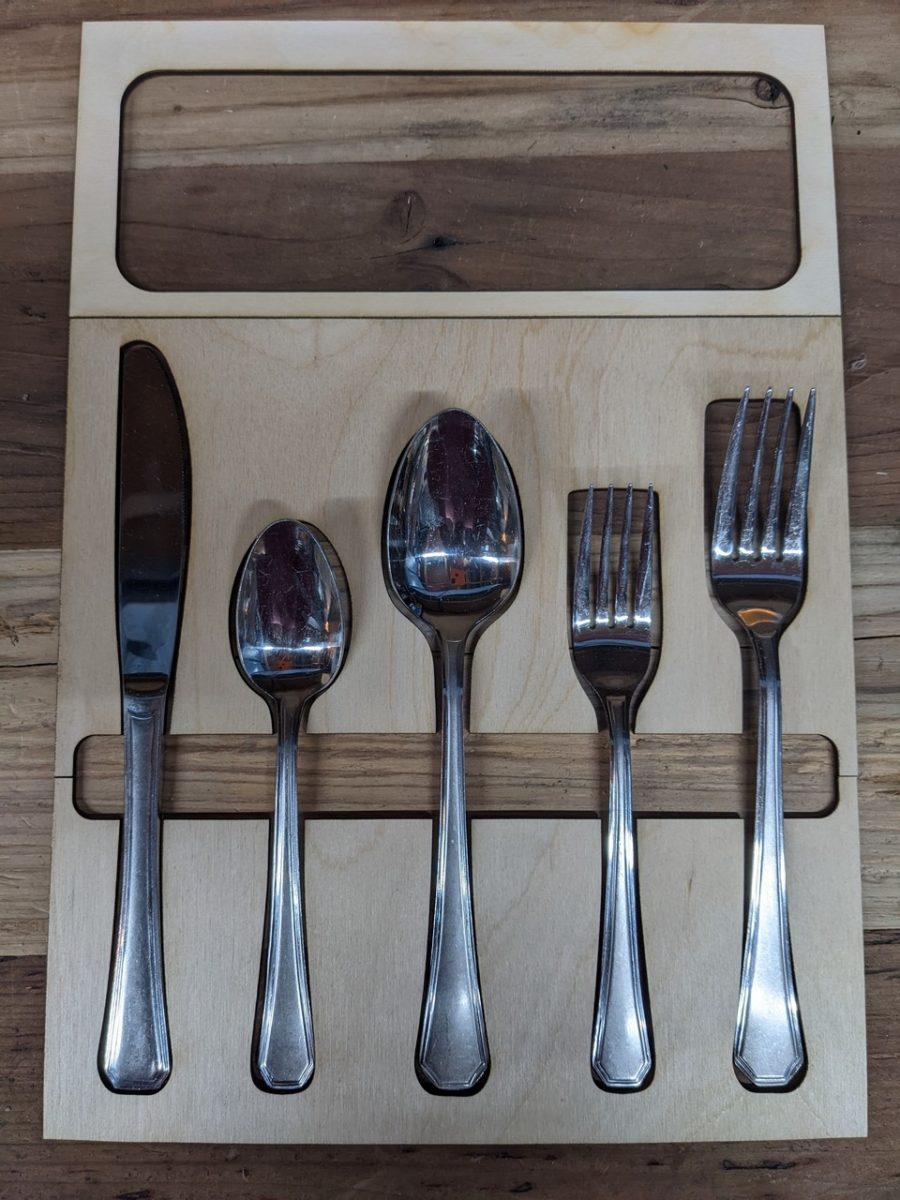
The scanned image was imported into AutoCAD and I traced an outline around each fork, knife, and spoon. I left a little bit of room around each piece to make it a bit easier to get things in and out of the drawer. I also moved things around a bit to get everything aligned and looking good.
After everything was aligned nicely, I added a finger slot in the middle, so you can get your hands in between the different areas to pull out the silverware. Additionally, I added a rectangular cutout at the top of the drawer to put all of that odd silverware that everyone seems to collect.

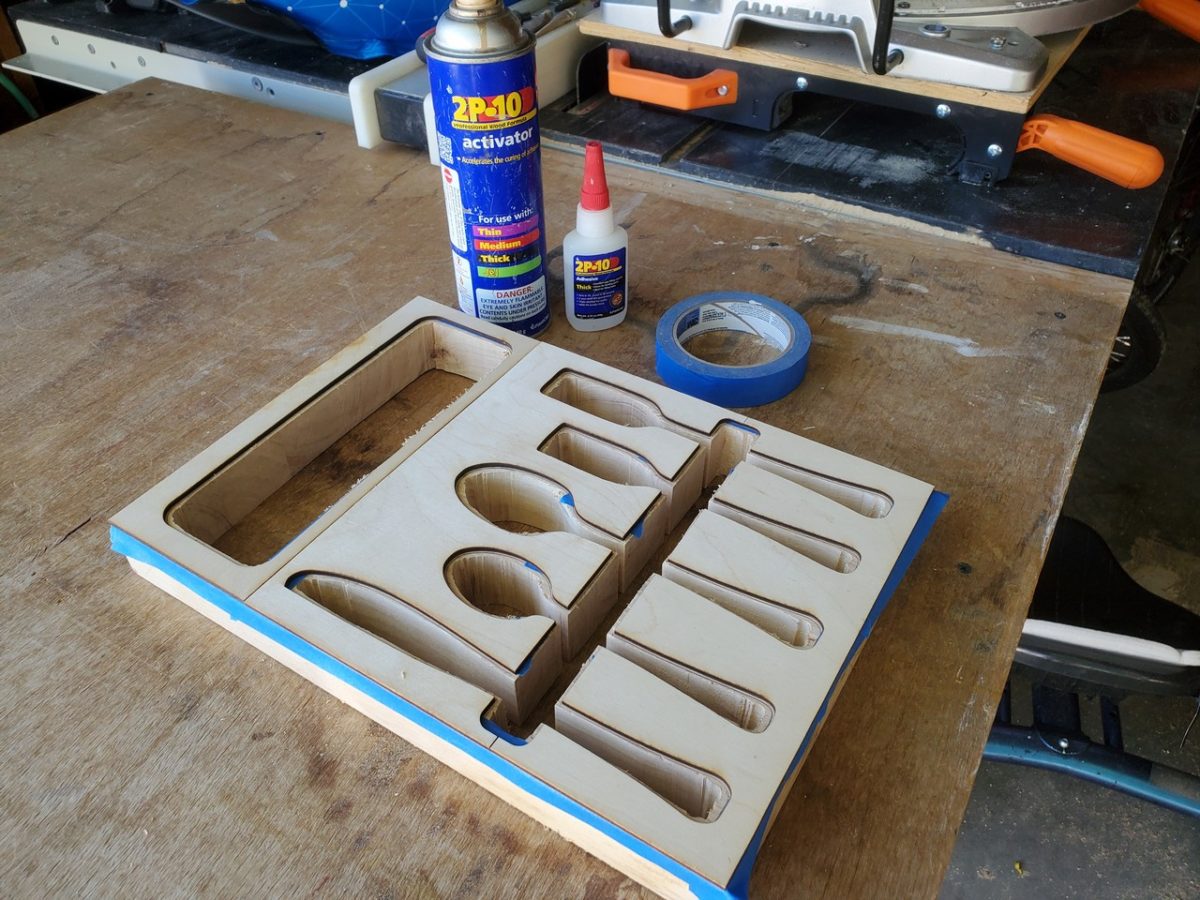
Cutting it out on the laser cutter was pretty straight forward. The only glitch for me was that my laser cutter is too small to fit the entire template. I solved that issue by dividing it up into (3) separate templates. I cut it all out with some 3mm plywood that I use for a lot of laser cut projects.

Rough Cutting
Now it was time to start working on the finished product. I took my templates out to the workshop (aka garage), and cut two chunks of butcher block countertop to rough size. I wanted the silverware holder to be 3″ thick, so that the forks and knives could all stack on top of each other. That meant that I needed to laminate (2) 1 1/2″ thick pieces.
The templates were positioned on each piece of wood and I traced the outline. It’s a lot easier to work with 1 1/2″ thick material than 3″ material for roughing things out at this point.
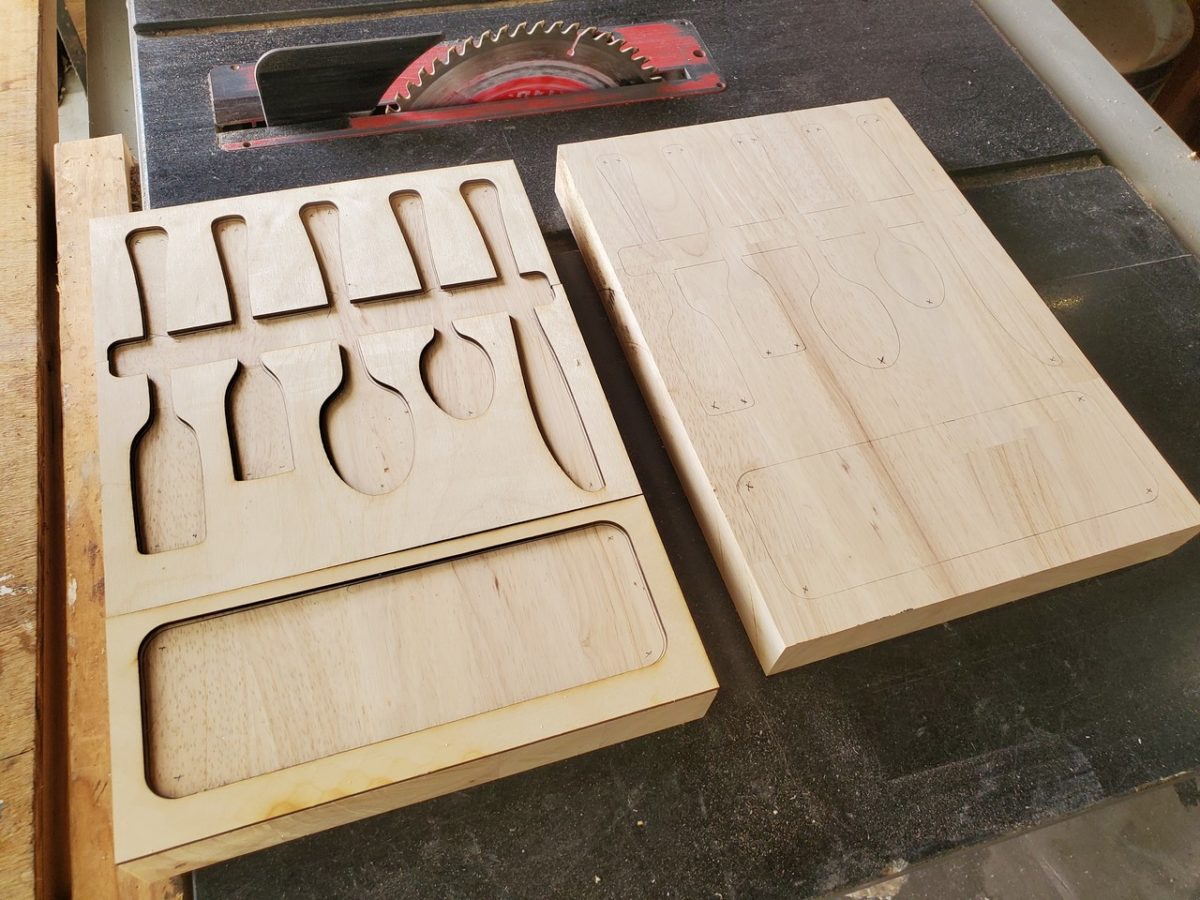
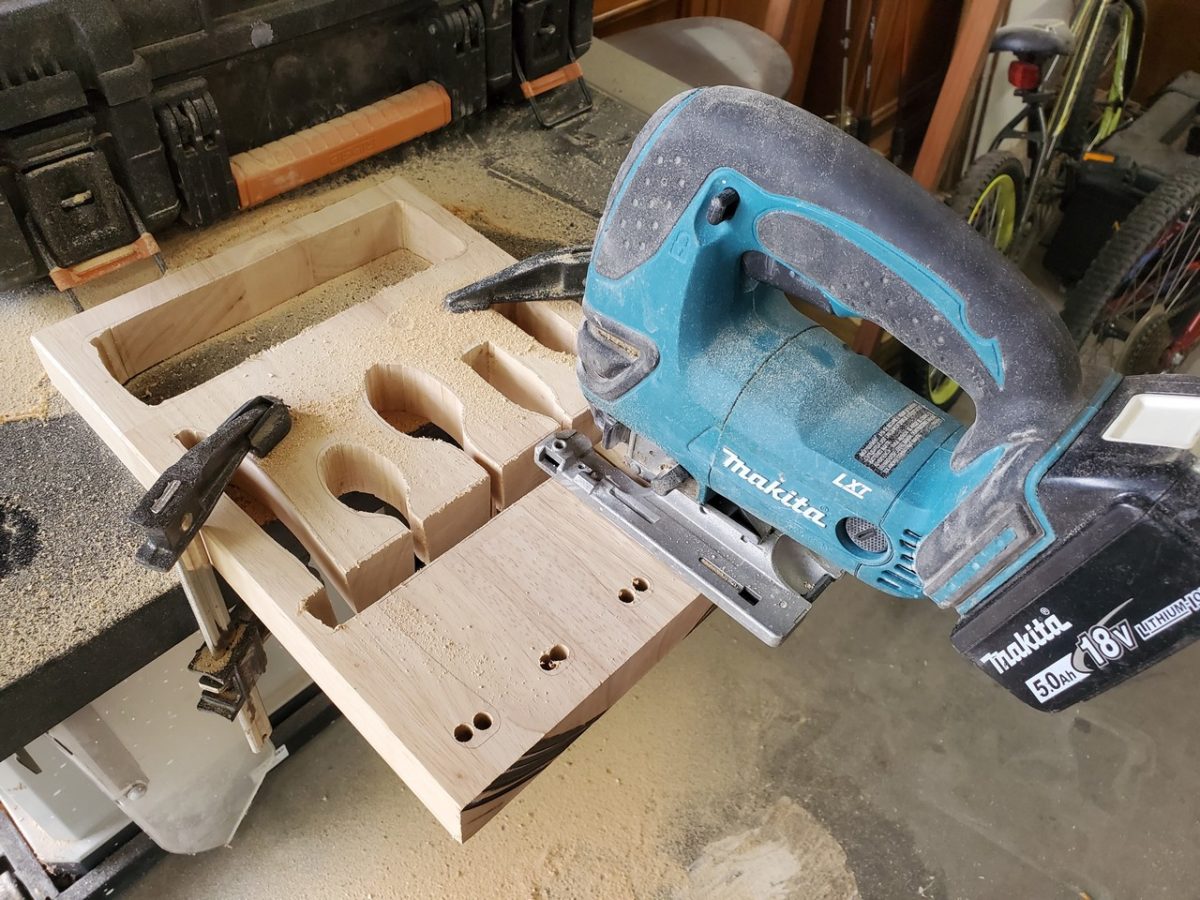
I took those pieces over to the drill press and drilled holes in all the sharp corners to make it easier to cut out with the jigsaw. The jigsaw made quick work of removing the bulk of the material. I made sure to stay at least 1/8″ inside the lines to be safe.
Using the Router Template
After the rough cutting was completed, I stuck the templates back on by using blue tape and CA glue. I put the painters tape on the butcher block first, to protect it, and glued the templates to the tape. This is a good trick to get the template stuck on good without damaging your work piece.
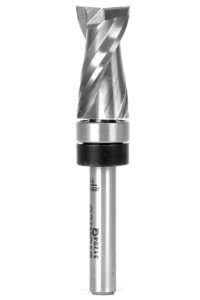
With a template routing bit (this is the one that I used) in my router table, I slowly followed the template edge to get a nice smooth cut. I had to remove the template, raise the bit and go around a second time to complete the cut, since the bit is only 1″.
I did all of this a second time for the other rough cut piece and then glued and clamped the two pieces together.
Sanding and Finishing
It would have been nice to glue the two rough cut pieces together first, but I could not raise the bit high enough to get through 3″ of material. That meant that I had to take it over to the spindle sander to remove the glue line. Of course, I had to finish everything up with a good bit of hand sanding too. It took a bit of extra work, but it turned out pretty nice.
I finished it up with a few coats of water based satin polyurethane to keep the nice natural color of the butcher block. And then it was time to clean out the drawer and put the new organizer to use. I love it. What do you think?
Till next time…