
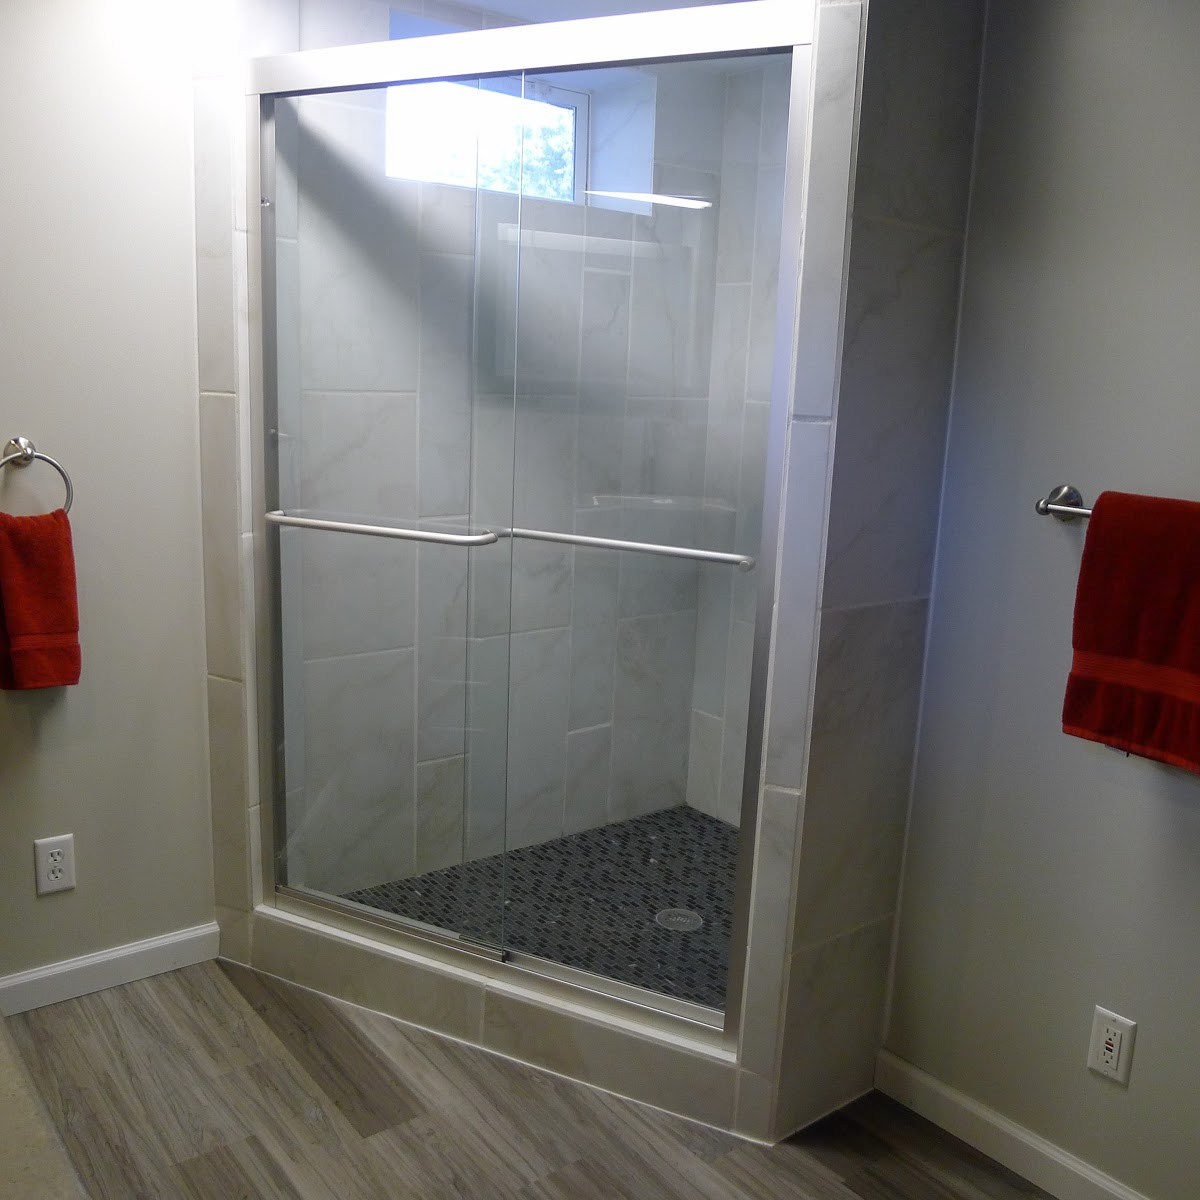
A DIY shower can be any shape you want! Did you know that? You don’t have to have a square, rectangle, or standard corner type shape. You just have to be willing to put in the extra elbow grease. Let me tell you how I did it… and you can too! (photo album)
The challenge in an irregular shaped shower is in the waterproofing technique. A leaking shower is no fun. A lot of damaged floors and ceilings have been caused by improperly waterproofed showers.
Waterproofing a shower consists of a floor basin that properly slopes to the drain and walls that shed water down to the floor. If you install a standard size shower, you can purchase a plastic or tile-ready floor pan that will get the hard part done for you in one quick step. If you want something custom, that means more work of course!
I’m not going to cover the plumbing and fixture installation details here. That is pretty much the same, for any shower. I used PEX tubing with crimp on connectors at all of the fixtures. I’ve used this method a couple of times now and it is fairly quick and cost effective compared to the old sweat copper methods. Check out the complete photo album if you’d like to see more details.
Materials
- 2x4s for framing and curb
- Wire lathe for curbing tile prep (Home Depot)
- Pre-Pitch (Amazon) / Quick-pitch system (Amazon)
- PVC Floor waterproofing (Amazon)
- PVC Solvent glue (Amazon)
- Concrete (Lowe’s)
- Roofing felt or heavy duty plastic sheeting
- Window and Door Sealing Tape (Lowe’s)
- Tile backer board (Lowe’s)
- Tile backer board screws (Lowe’s)
- Tile backer board seam tape (Lowe’s)
- Tile – Walls (Home Depot) and Floor (Home Depot)
- Mortar (Home Depot)
- Grout (Home Depot)
- Shower Doors (Home Depot) or curtain
Framing
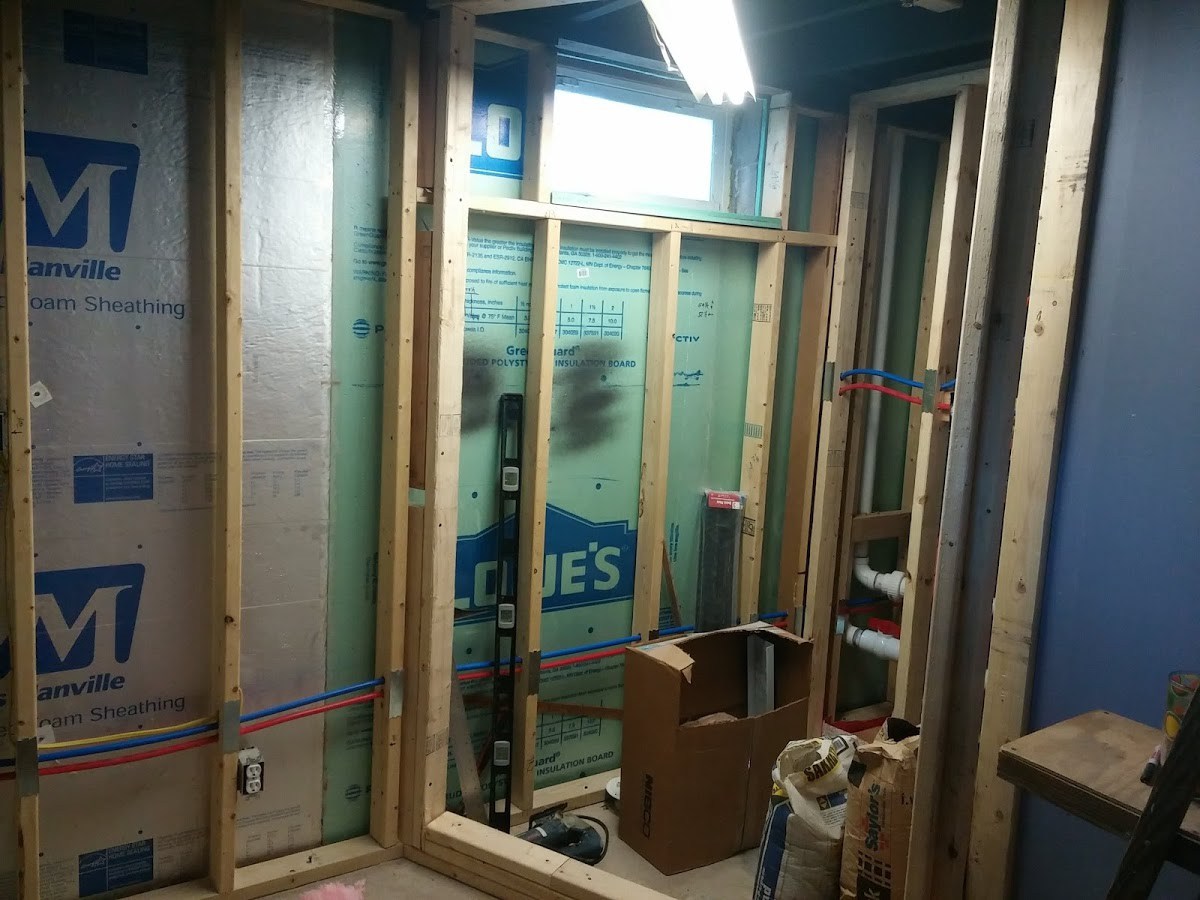 Framing a shower is no different than any other wall framing. Make sure that you have adjacent studs in every corner to provide support and anchoring points for the wall and ceiling sheeting. Make sure that you install blocking all the way around the base so you can attach your backer board after the floor is pitched. You also need to consider the fixture locations and add additional cross members where fixtures will be mounted.
If you are going to use shower doors, make sure that you consult the manual for the proper opening size. Don’t forget to account for the thickness of the tile and backer board!
For the shower curb, I used a triple 2×4 across the opening. I think that provides a nice compromise of a low step over, while still keeping the water in the shower. I have seen other installations where some people choose to use bricks here also.
Pitch The Subfloor
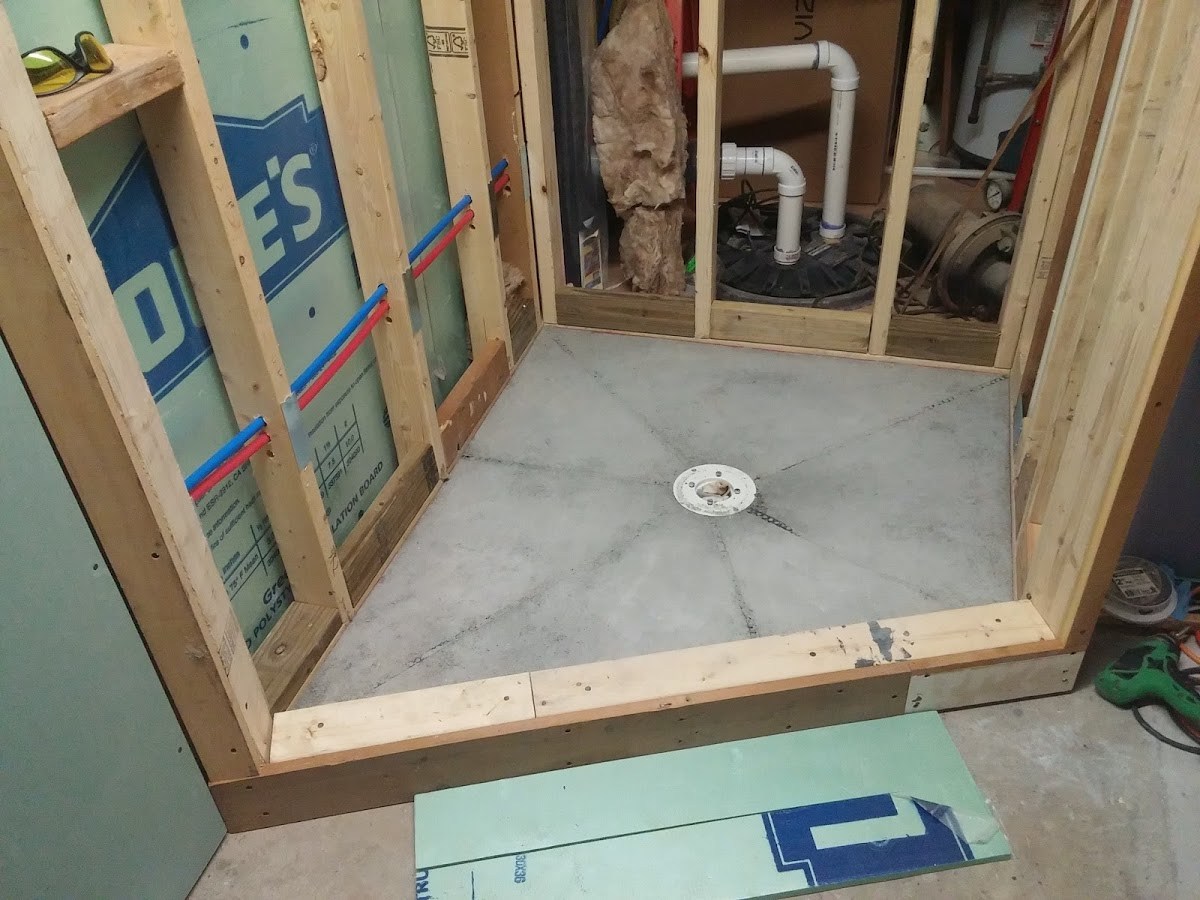 By sloping the subfloor, any water that seeps through the tile will be directed to the “overflow” drain by the waterproof pvc membrane that is installed in the next step. I used the Pre-Pitch system to set the pitch of the subfloor. It’s pretty overpriced for some angled plastic pieces, but it also made this part a lot easier for a novice tile installer like me.
First, I cut them to length. Make sure that you measure from the skinny end on every piece. Then, I screwed them to the floor with some concrete screws so they were about evenly spaced out around the drain hole. The plastic pieces provide a nice guide for your trowel when you smooth the concrete, so you get a consistent floor pitch toward the drain.
Next, I mixed some concrete. You want the mix to be relatively dry for this step. You are trying to create a solid base with a consistent pitch and you don’t want the concrete to slump or shrink as it dries. I just packed it in between the plastic pitch pieces and smoothed it even with the plastic guides with a trowel. Make sure that you don’t clog up the drain area with concrete.
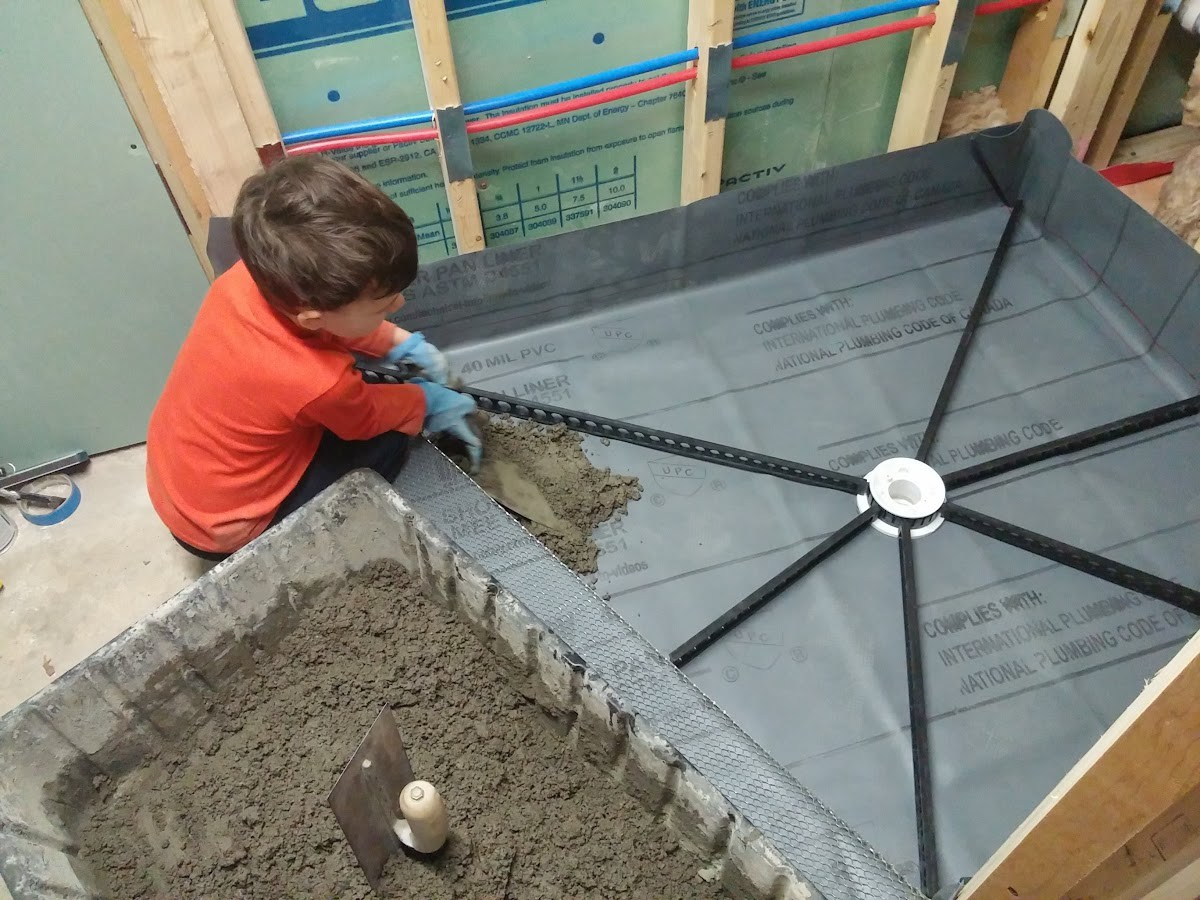
Install The Waterproof Floor Membrane
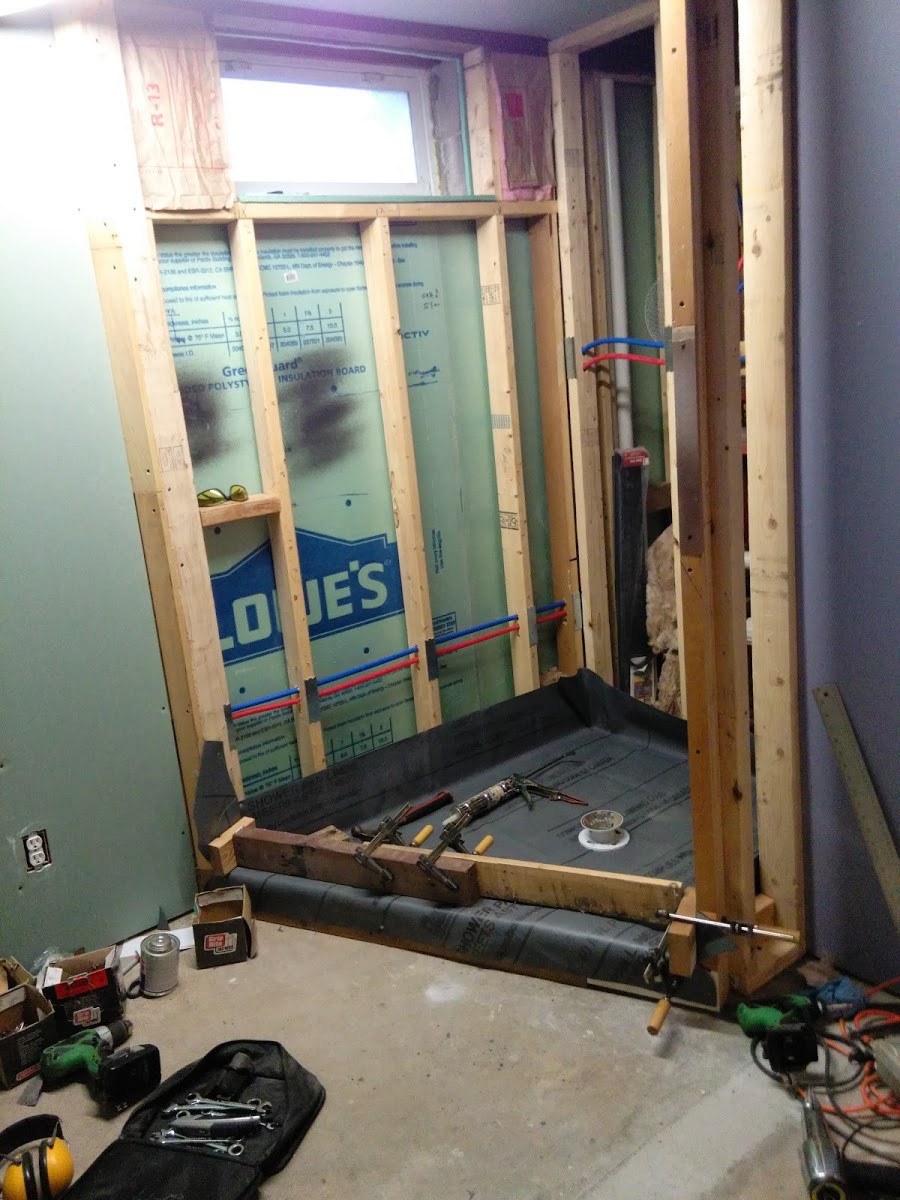 This part was a bit challenging for me. The PVC floor membrane material is thick and that makes it a bit challenging to work with. The membrane should go up the walls about 6 inches all the way around and cover the entire curb.
Inside corners of the shower are folded over similar to wrapping a present. Do not cut! Just place a staple or two to attach the folded section to the wall. Keep any staples you need as high as possible.
Outside corners are more difficult. For most showers this is where the shower door is located. You really cannot avoid cutting here. Cut from the corner such that the bottom piece will fold all the way over the curb and cover the entire curb. You will end up with a gap on the wall side when you fold it over. Tack the curbing cover in place on the outside only and add a few staples to hold the wall piece in place.
I then cut some small scraps of the membrane to patch the corner cuts. They do make some special outside corner pieces that you can buy if you want to, but with a little patience I saved a few bucks here. Just glue the patches into the corner with the special membrane glue. Be careful to get everything sealed up. I found that the glue was not that fast to dry and ended up putting some scrap wood, weights, and clamps around as necessary to hold the patches in place while the glue dried overnight.
Prep The Curb For Tile
Next up is to get the curb ready for tiling. The tile needs a solid surface that the mortar will adhere to. I cut a piece of wire lathe the width of the curb and long enough to go from the floor on one side, up and over the top, and down the other side of the curb.
I used a 2×4 as a straightedge to bend the wire lathe into the shape of the outside of the curb. Place this form over the curb and secure with a couple of staples on the outside only.
Mix up some more dry concrete and cover the mesh to form a flat surface for the tile. The wire lathe acts as a mesh to hold the concrete in place. Now is a good time to pitch the top of the curb slightly toward the inside of the shower to keep the water flowing that way too.
Pitch The Floor
 To finish prepping the floor for tile, you have to install the second part of the Quick-Pitch system now. Similar to pitching the subfloor, the sloped plastic pieces make it easy to get a consistent floor pitch towards the drain. This pitch needs to account for the floor tile and grout thickness so that the finished floor will slope from the walls to the top of the finished drain.
Do not use any screws or fastening methods that will penetrate your waterproof membrane.
Make sure that you keep the lower weep holes in the drain clear of concrete to make sure that the membrane can drain away any water. Some people use pebbles or plastic pieces to keep a little clearance around the drain area. My drain assembly had a little plastic shroud to keep concrete away from this area.
Mix some more concrete and trowel it level with the top of the plastic guide pieces. This is exactly the same procedure as was done for the subfloor. Now your floor should be ready for tiling.
Seal The Walls
 With any waterproofing project, you should start from the bottom and work toward the top. Water does flow downhill after all!
Now that the floor is waterproof, it is time for the walls. I chose to use roofing felt for this part, because I had some left over from a roofing job, but next time I would chose to use heavy duty plastic instead. The roofing felt was difficult to work around the corners. It just doesn’t bend well.
I did two overlapping layers to completely cover the walls. The first layer goes over the top of the floor membrane that goes slightly up the wall, and the second layer starts at the ceiling and goes over the top edge of the first layer. Using plastic would probably avoid the need for two layers, since you can get it in much larger widths. Also, don’t go too crazy with the staples to hold the felt/plastic up. Use just enough to hold it up. The backer board and screws will also keep the felt secured.
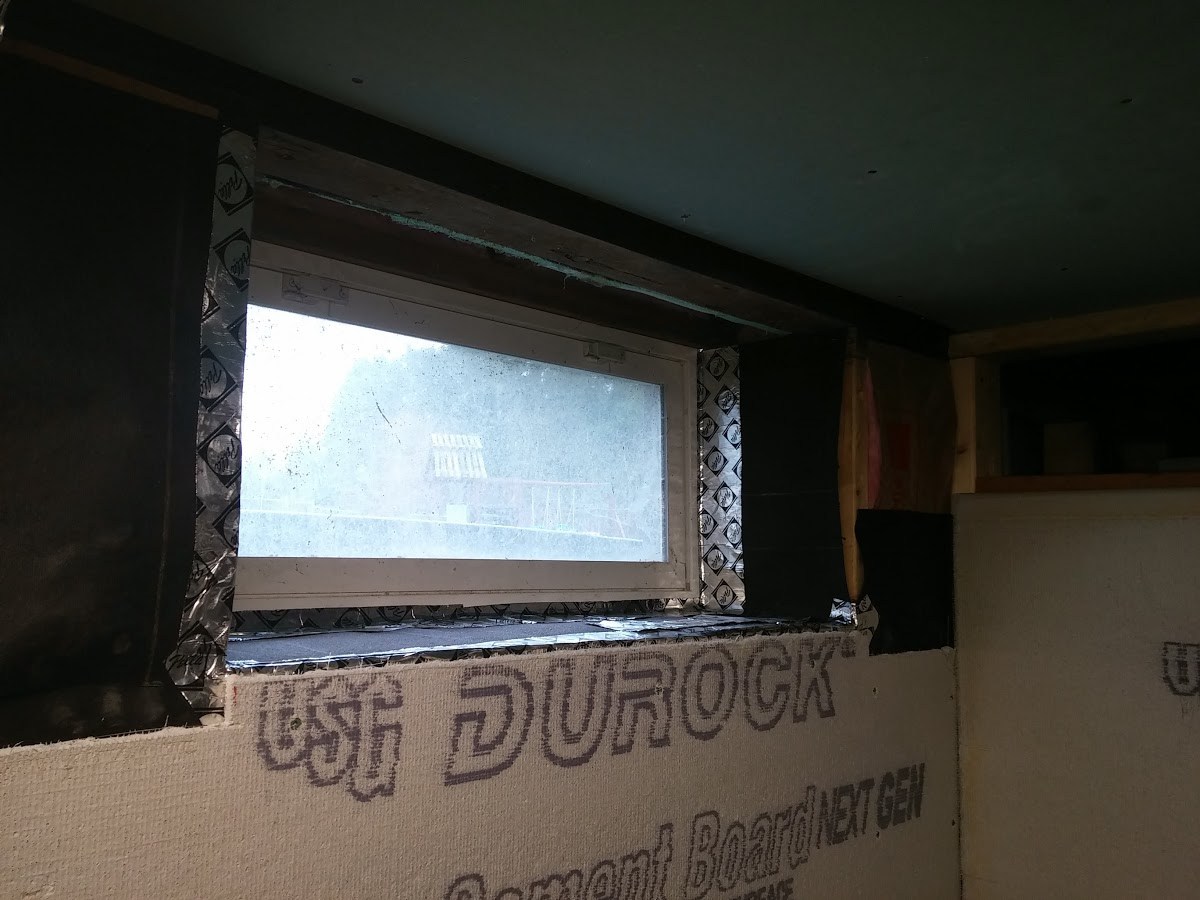
I also sealed around the window opening and fixtures with window and door sealing tape. It is rubberized and super sticky and really works well for sealing up any joints that are not easily sealed with the roofing felt or plastic sheeting.
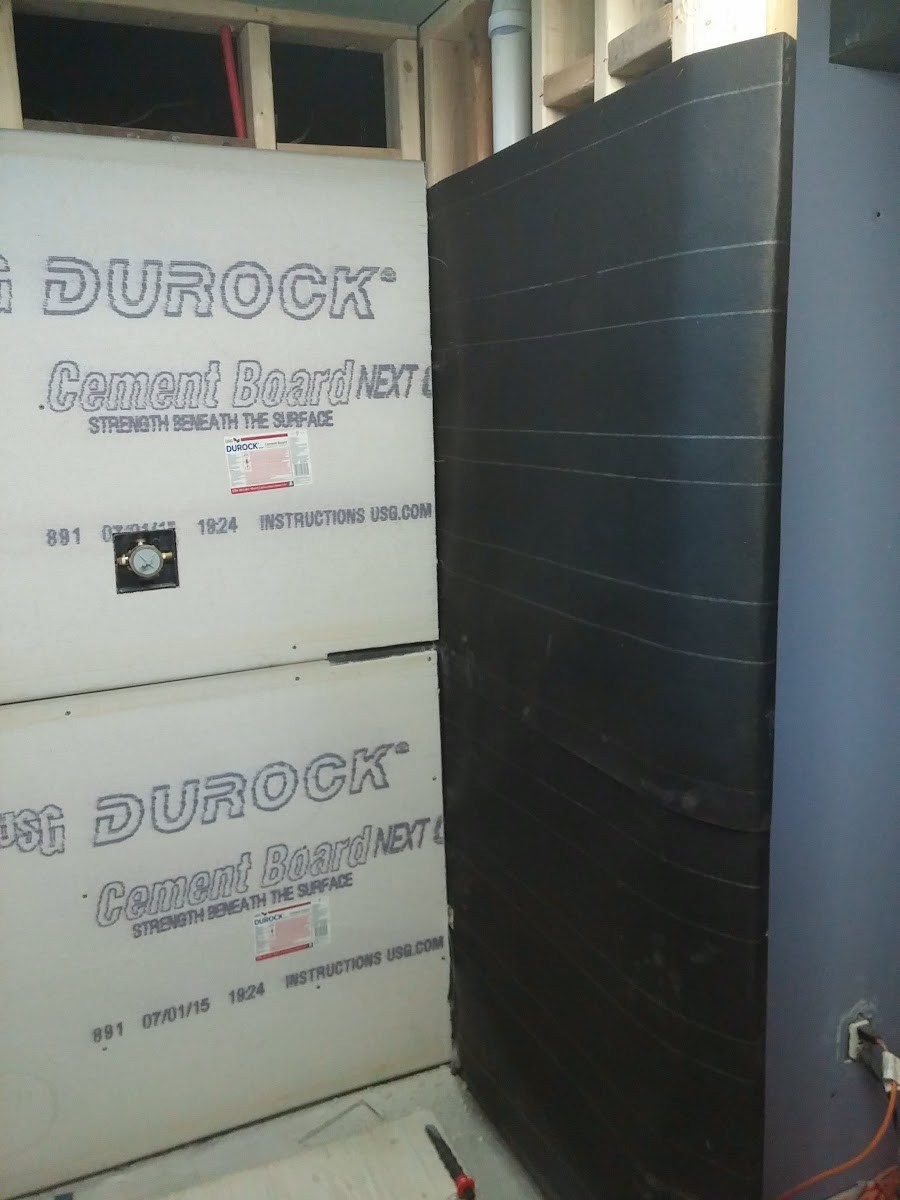
Install Tile Backer Board
 I used Durock tile backer board and Rock-On screws. It is important to use the type of screws that are designed for installing backer board. They have serrated edges that cut into the backer board and allow them to sit flush. It will make tiling very difficult if the screws are not flush.
I also sealed all the seams with tile backer board tape and mortar. It never hurts to add another layer of waterproofing. It also makes the seams smooth for adhering the tile.
Just an FYI on cutting tile backer board… It cuts easily with most types of jigsaws or circular saws, but that will make a lot of dust. I use a carbide cutter to score and snap any straight cuts just like you would with drywall. That keeps the dust down quite a bit.
Tiling


This was also the first wall tiling that I did. Some people are concerned about the tiles falling off the wall. As long as you don’t mix the mortar too wet and you apply the mortar properly to the wall and tiles, this should not be an issue. I also started at the bottom and worked up, so that the tiles and spacers held each other from sliding down the wall.
I’ll cover more on tiling in a future post.
Additional Considerations
A couple of other points to consider with any shower installation are ventilation and lighting. I installed a typical ceiling mount ventilation fan with a 4″ duct and louver directly out the back wall of the house between two joists in the middle of the bathroom. I also mounted two ceiling lights right outside the shower door. They provide good light without being directly in the wet area. The window in my shower is also great for natural light. The vinyl window material should hold up well to the moisture too.
Hopefully, you picked up a useful tip or two if you decide to tackle this extreme DIY project yourself. Any questions?… Let me know in the comments below.
Till next time…
[…] cartridge. A faulty or clogged cartridge restricts flow noticeably. One builder’s guide on custom shower shape options notes that odd-shaped builds sometimes require relocating the valve to keep it accessible from the […]