
Two summers ago I installed a DIY sprinkler system for our yard. If you haven’t checked out that post then head over here. It gives a lot of good background information on the original installation and layout of the sprinklers.
This past summer, I made a few improvements:
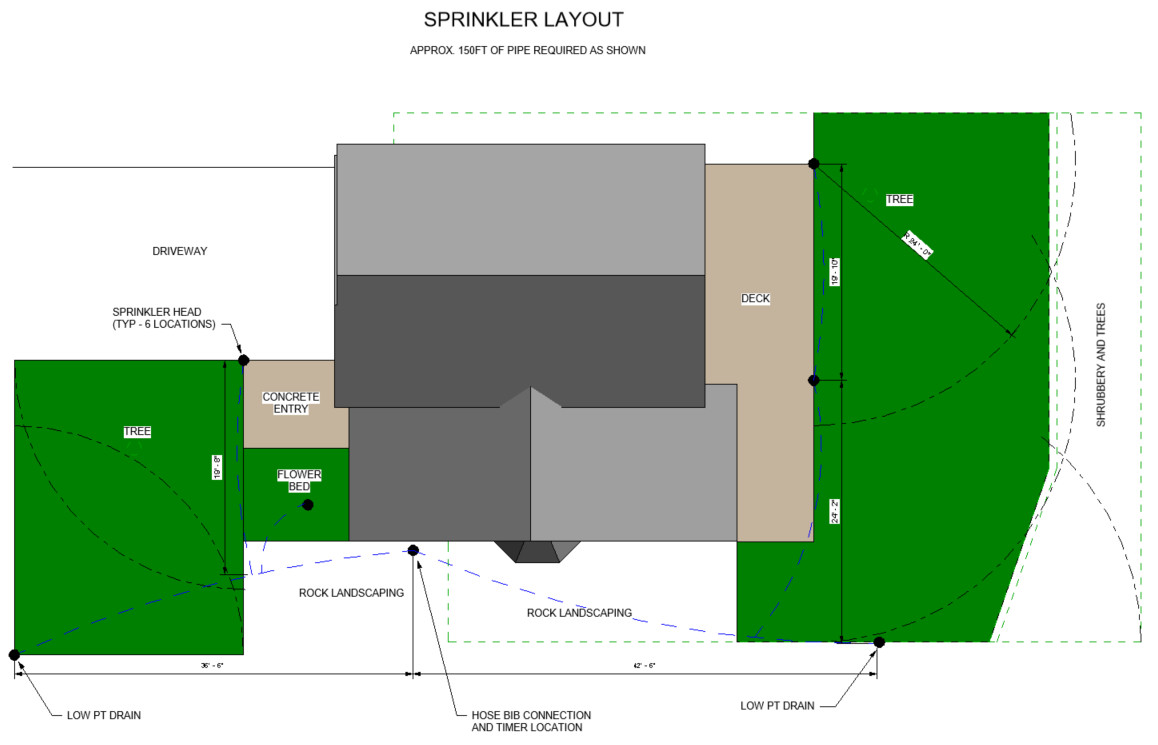
- Added two more sprinkler heads
- Split the system into two zones
- Installed new smart sprinkler controller and automatic valves.
Parts List
- Rain Bird 32SA sprinkler heads
- Elbows for sprinkler hose attachment to sprinkler heads
- Sprinkler tubing
- Tees for sprinkler tubing
- 4-way Manifold for attachment to spigot
- Orbit 3/4″ automatic sprinkler valves
- 3/4″ x 1/2″ barb for sprinkler valves
- Orbit Bhyve Smart WiFi Sprinkler Controller – 4 zones
Adding the New Sprinkler Heads
Adding more sprinkler heads to an existing sprinkler system is not that complicated. It does require a bunch of manual labor though.
First you have to dig up the existing section of sprinkler piping that you would like to tie into. You will need to add a tee in the existing line. Then you need to trench over to the new sprinkler head location to lay in the new pipe and set the new sprinkler head in place.
In my case this wasn’t a major project. I knew where the sprinkler piping was under the ground, so I just located where I wanted my tees and dug it up. Trenching across the yard to the new locations was a good workout, but it went pretty smoothly too.
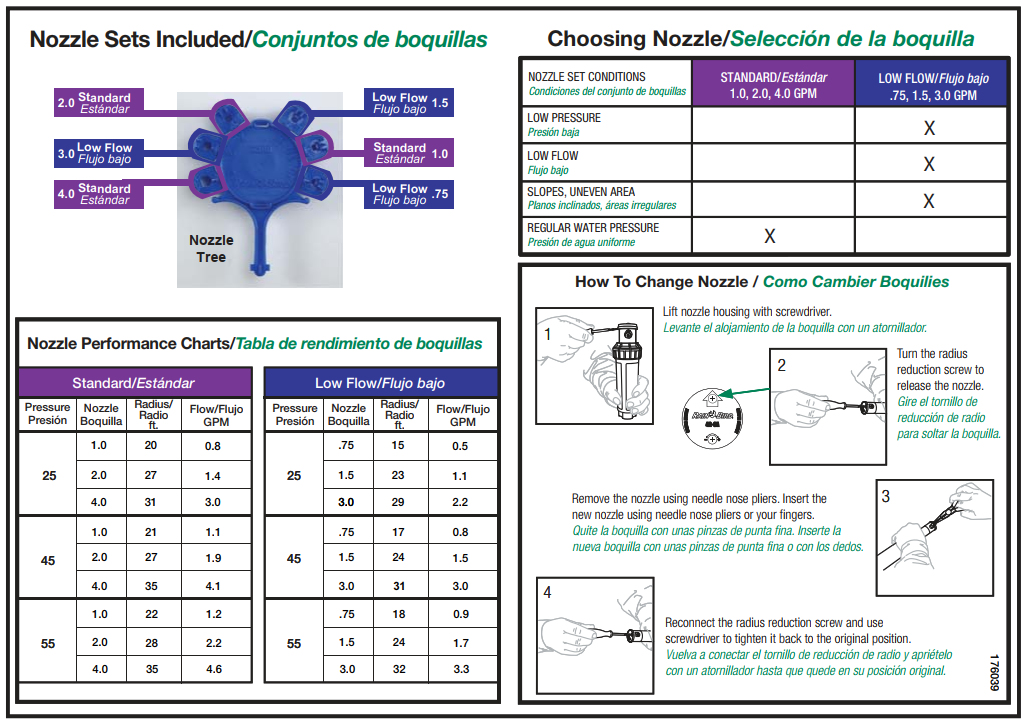
You do need to consider a couple of things when adding new sprinkler heads to an existing zone. One thing is the coverage of all of the sprinklers in the area. You might need to replace sprinkler head nozzles to adjust the range of the existing sprinklers or change the end stops for those sprinkler heads.
The other thing to consider is the total water flow rate in that zone. Depending on your water pressure, you will have a maximum flow rate that the sprinkler pipe system can support. The total of the sprinklers in each zone cannot exceed that maximum or the sprinkler heads will start to lose sprinkling distance. You can check this flow rate by using an outside spigot to time the filling of a five-gallon bucket. Sprinkler heads each have a flow rating that you should be able to find on the nozzles or in the literature.
Splitting up the Zones
The original sprinkler system that I purchased was a single zone with a basic timer type controller that connects to an outdoor faucet. This actually worked pretty well for our small yard, but I decided to split this into two zones this year for a couple of reasons.
First, adding two more sprinkler heads was definitely going to be borderline with the amount of water flow that I have out of my single spigot, as discussed in the previous section. Also, our front yard has a lot more shade than the back yard, so it needs less watering. This is probably the biggest downside of a single zone system.
Depending on how you want to split up your sprinkler system zones, this can be an easy job or it could require a bunch more digging. Each zone is controlled by an automatic valve and these valves are usually part of a valve manifold that is connected to the water source. For this design to work, each zone must start at the valve manifold and go in the different directions.
This is why I decided to go with just front yard and back yard zones. I had installed a tee near the spigot originally to go in those two directions, so I just had to dig up the tee and extend each pipe individually up to the new valve manifold. That only required a few feet of new pipe.
Installing the Smart Sprinkler Controller
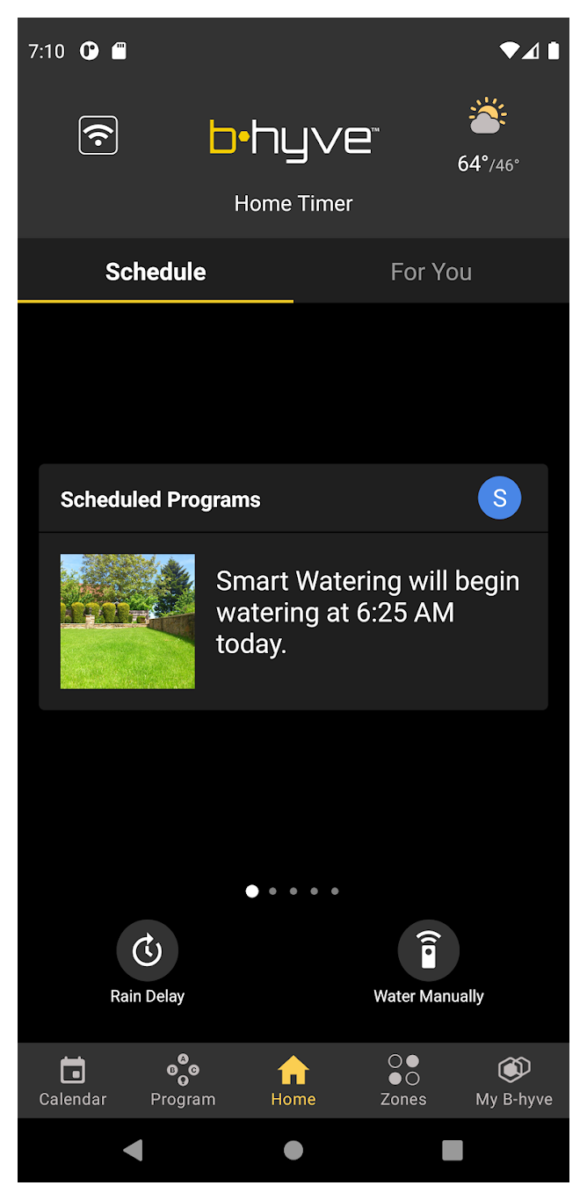
I was really surprised to find a smart sprinkler controller for $50. I’m a techie kind of guy, so I just couldn’t pass it up. The Orbit B-Hyve 4-zone controller is awesome. It allows scheduling of the different zones and also has smart irrigation controls that monitors rainfall and freezing temperatures to adjust the sprinklers automatically. Cool.
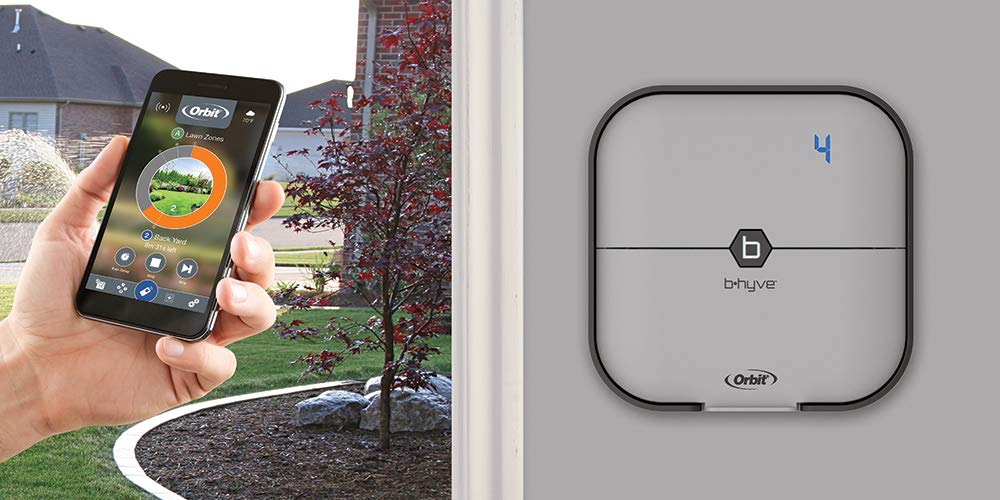
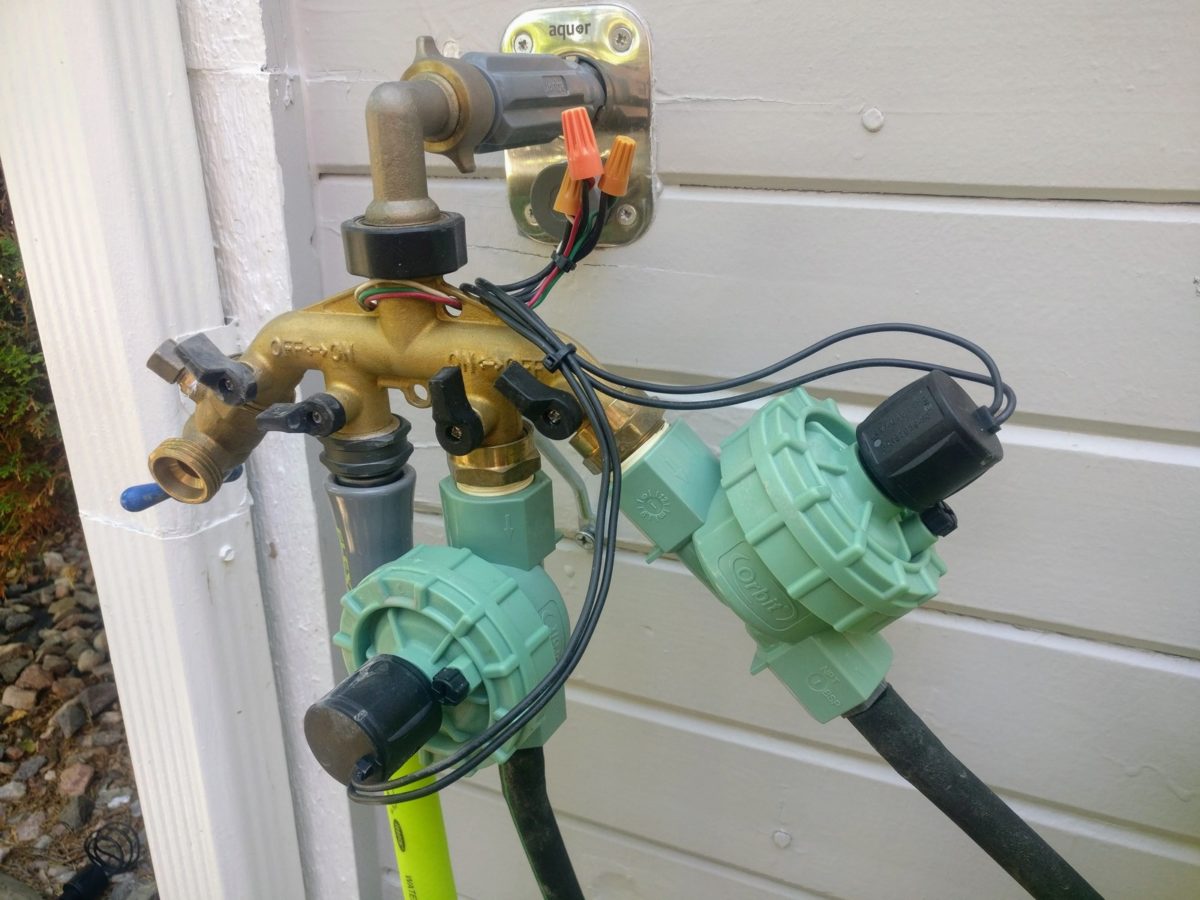
To use an irrigation controller like this, you also must have automatic valves on each zone. I decided to use the same basic type of valves that any other sprinkler system uses and just connect them to a manifold at the hose bib on the house. These valves are 24v and get powered directly from the irrigation controller. The parts are listed at the top of this article. This is what that setup looks like on the side of the house…
Now I just had to mount the controller inside the house and run wires from the controller to these valves. In my case, I chose to mount the controller inside our coat closet that is just on the other side of the wall. That made it easy to just drill a hole in the wall to run the wires outside. Keep in mind that you will also need an outlet nearby to power the controller.
Upgrade Complete!
It’s pretty cool when your phone tells you that the sprinkling is finished… at least it is for me.
Till next time…
Hey what kind of irrigation wire did you use? And how did you run those to the timer? Underground?
I just used some spare solid core wiring that I had laying around. My controller is in a closet just on the other side of the wall from the outdoor spigot, so I was able to just drill a hole through the wall. However, you could definitely run it underground if you need to. Just make sure that you use underground type wire. It will have a little more protection. Here is something that will work for most applications… https://amzn.to/491CoD4. It could be used underground or above ground. You need to get one that has one more wire than the number of zones that you have, so you have a “common” wire that brings power to all of the zones. For example, if you have 4 zones, you need a cable that has at least 5 wires.
Thanks for the response. Can the same setup be run from main directly?
Absolutely. It should work fine.
Wish I had done it years ago . The trees are well established now . Dug the holes 4 feet deep when planted from 4 and gallon containers . The garden would be in a lot better shape if I had .